How to Create Push Experiments
Sometimes, we may not get the right push notification messaging right the first time. That’s why it’s important to experiment with different content, timing and personalization strategies to understand what resonates with your users to drive engagement and retention.
This is where Push Experiments come in - A/B testing your pushes allows you to experiment with variations and segmentation of your pushes to determine which versions have the greatest impact.
What to test in a push experiment?
- Content: Text, use of emojis, images - what combination and positioning works best?
- Timing: Is there a specific time of day when users are more engaged?
- Audience: Will different user segments be more engaged with different content?
Create your push experiment

1. Create and configure your push experiment
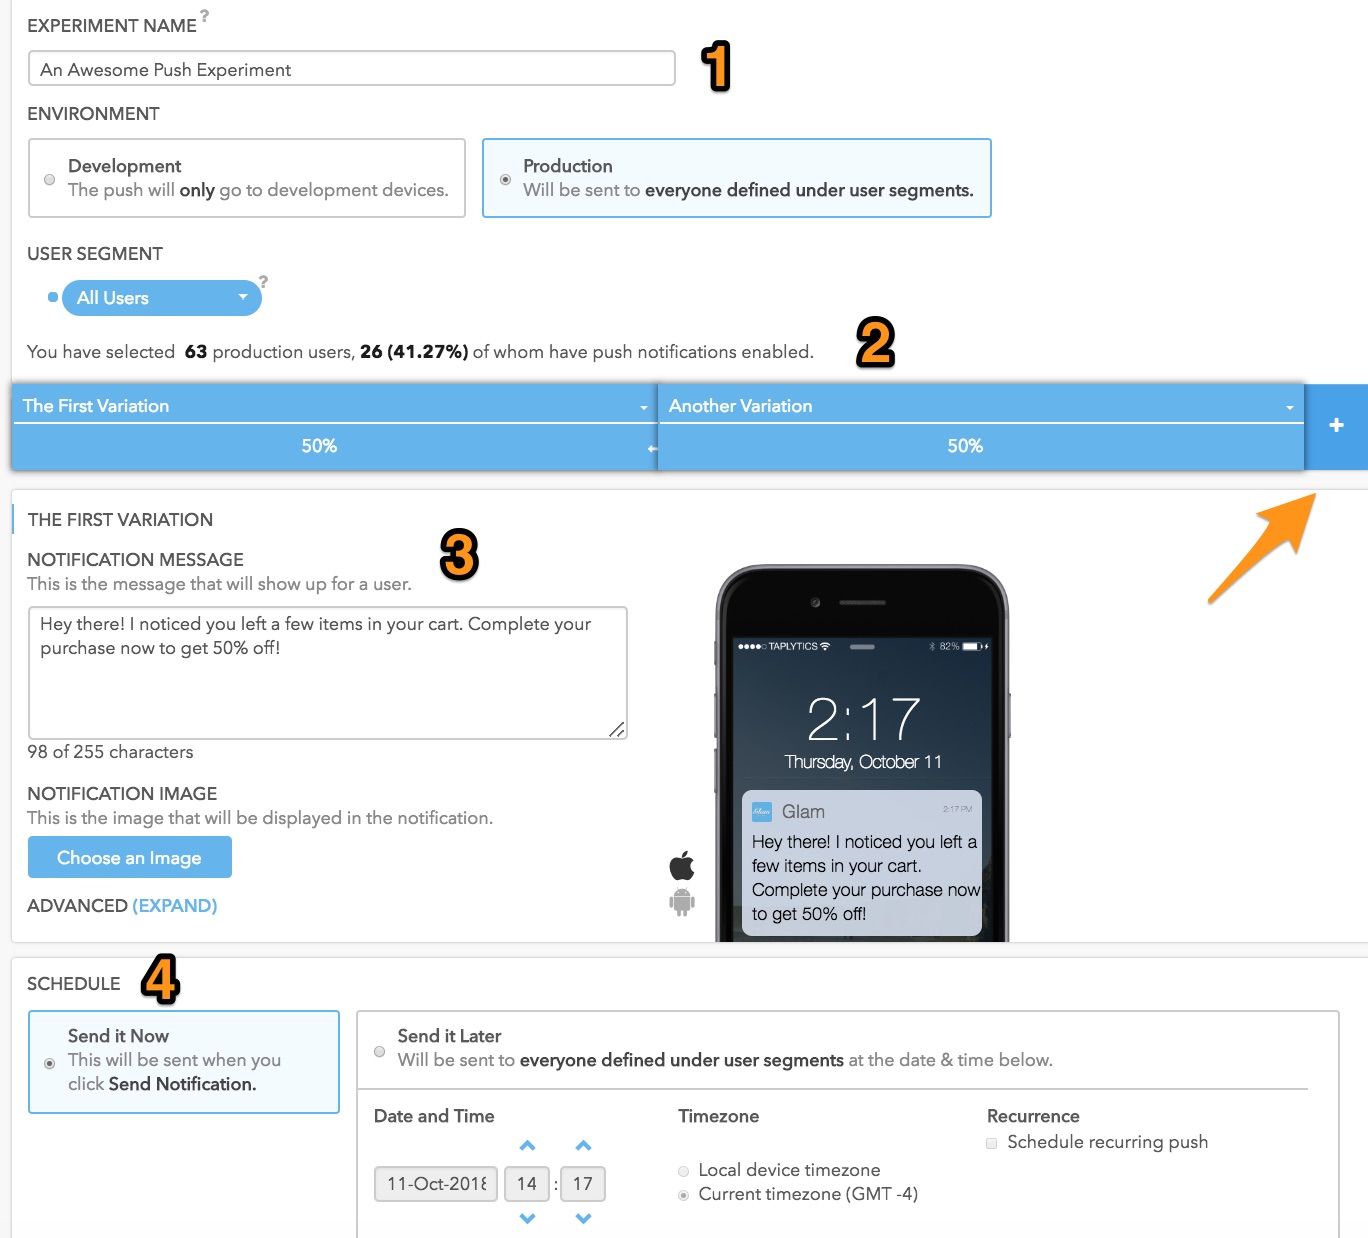
Under the Push menu in your Dashboard, click on Create New Push > Experiment. you will then need to choose a name, environment, and User Segment for your push notification experiment.
You can choose to send the push to Development or Production devices; if you are QA'ing your app and would like to push only to phones with a development build, choose Development. If you are ready to roll your push experiment out to Production users (which you can narrow down in the next section), choose Production.
2. Create your variations
Click on Add Variation to start creating different variations for your push experiment. Once you have created your first variation, you can create additional variations by simply clicking the (+) symbol on the right-hand side of the variants.
Make sure you associate each variation with a descriptive name, and a % to distribute to!
3. Configure your push notification content
You can type insert up to 255 characters in each push notification - you can also insert emojis by simply pasting or typing them directly into the notification message text box. This is where you would insert an image as well - check out our Rich Push Notifications docs for more info!
4. Schedule your push experiment
You can either send start your push experiment immediately (Send It Now) or sometime in the future (Send It Later). Make sure to double check the timezone that you would like to send the push to!
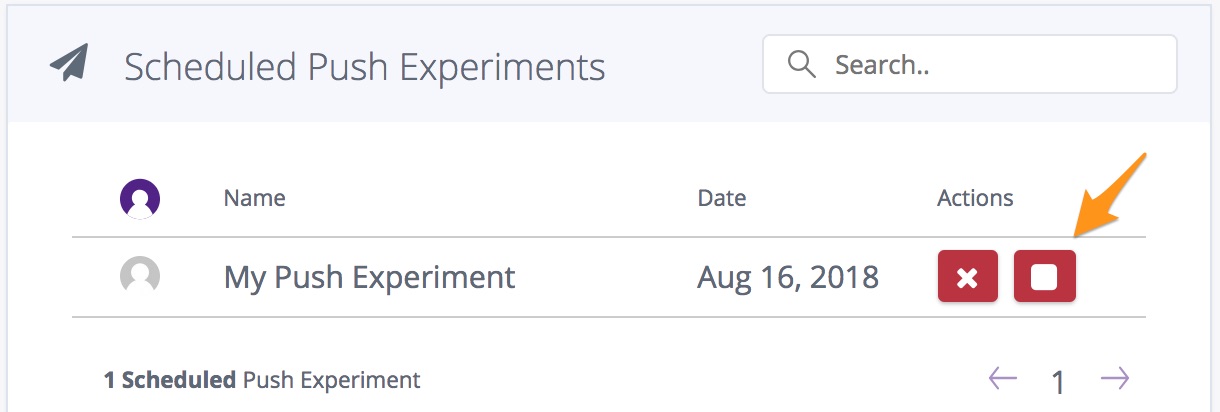
You can stop scheduled push experiments that have not been sent out yet, by navigating to the push experiments screen on your Dashboard and clicking the stop button next to it.
Important note: If you choose to send a push experiment instantly, it will start sending as soon as you select "Send Now”, so you won’t be able to “unsend” any pushes that have been already sent!

Updated over 6 years ago
