How to Generate & Upload Push Certificates
Once you've integrated Taplytics Push Notifications code by following the below instructions for the relevant platform(s), you will need to upload your Apple and/or Google Push Certificates before you can use Taplytics Push Notifications.
Apple Certificates
Upload your Apple Push certificates so you can send push notifications to iOS devices using Taplytics. If you don’t already have your certificates created, don't worry. We will help you through this 3-step process.
1. Create a certificate request
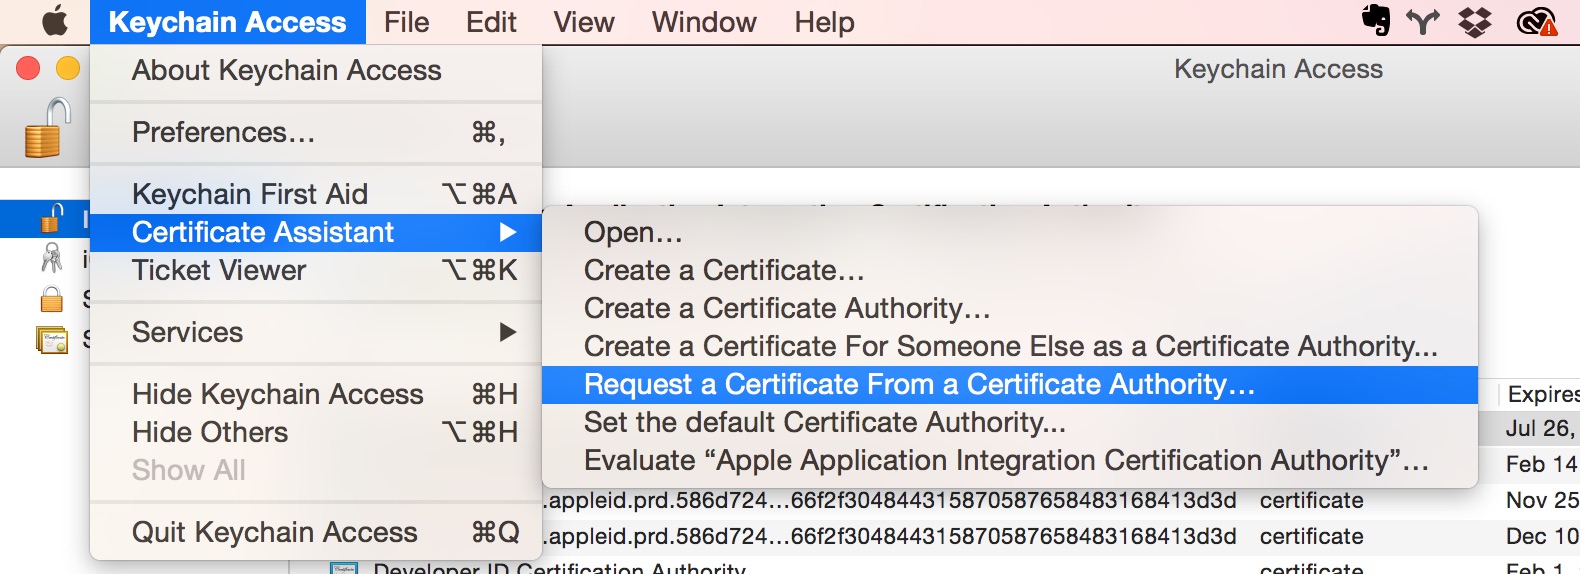
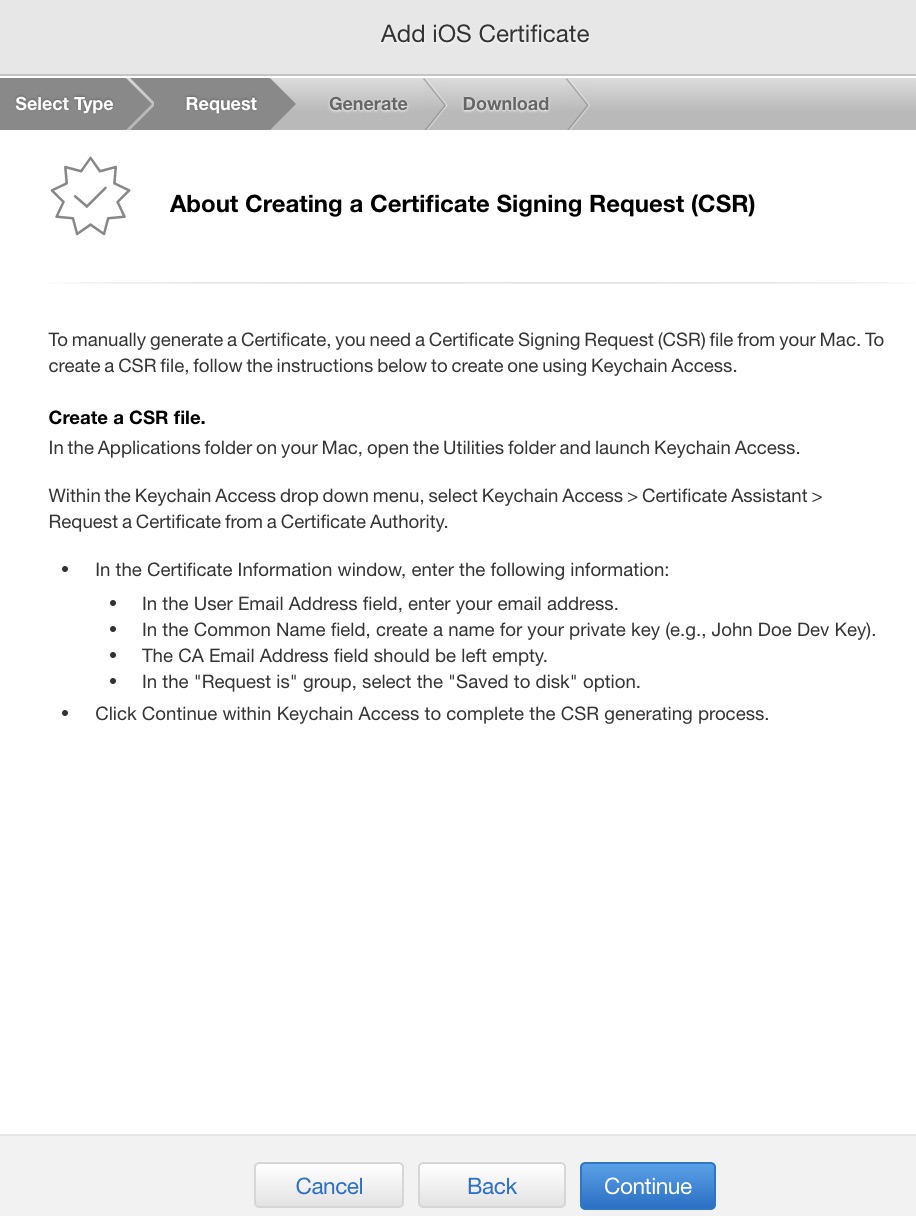
To begin, create a certificate signing request file. This is used to authenticate the creation of the certificate. On your Mac, launch the Keychain Access application. In Keychain Access, click the "Certificate Assistant", and select "Request a Certificate From a Certificate Authority".
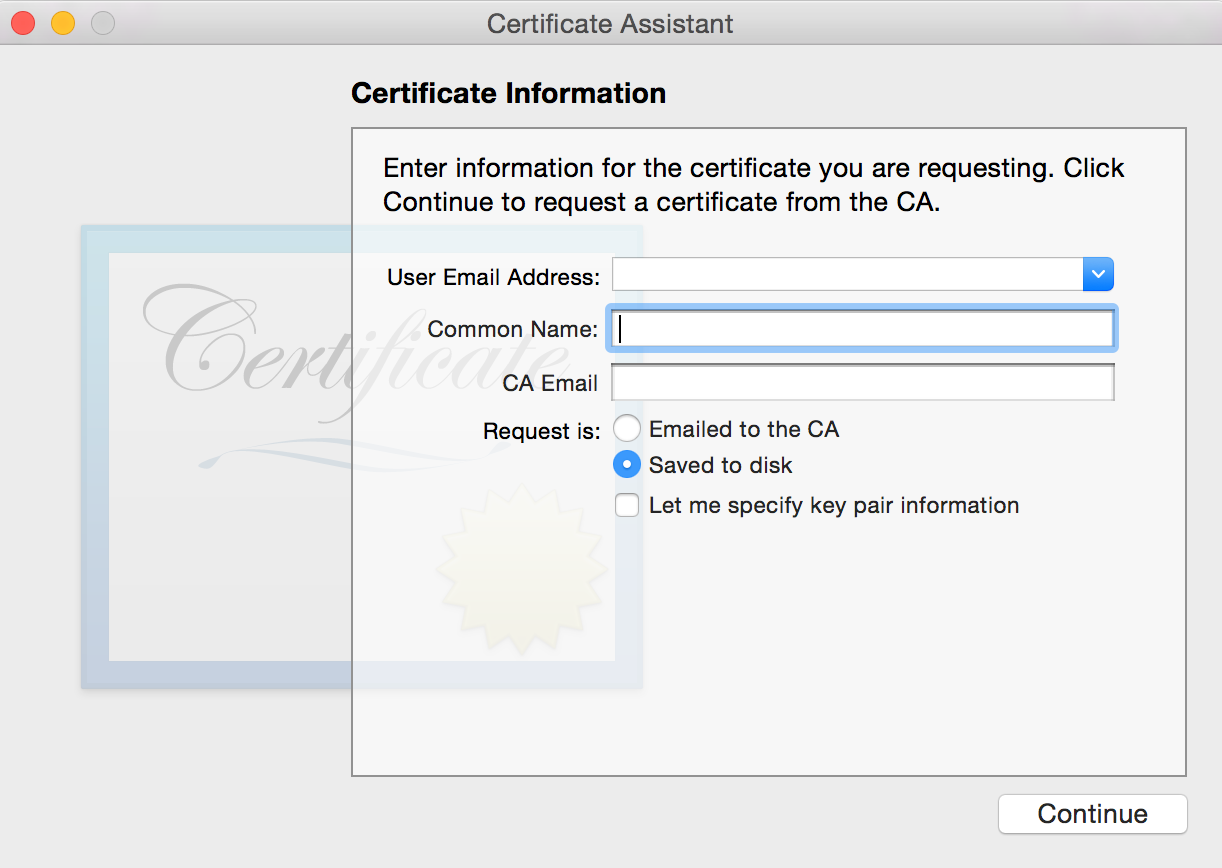
Enter your Name and User Email and make sure to click "Saved to disk". Next, press "Continue". Your ".certSigningRequest" file will save to your Mac.
2. Generate your push certificates
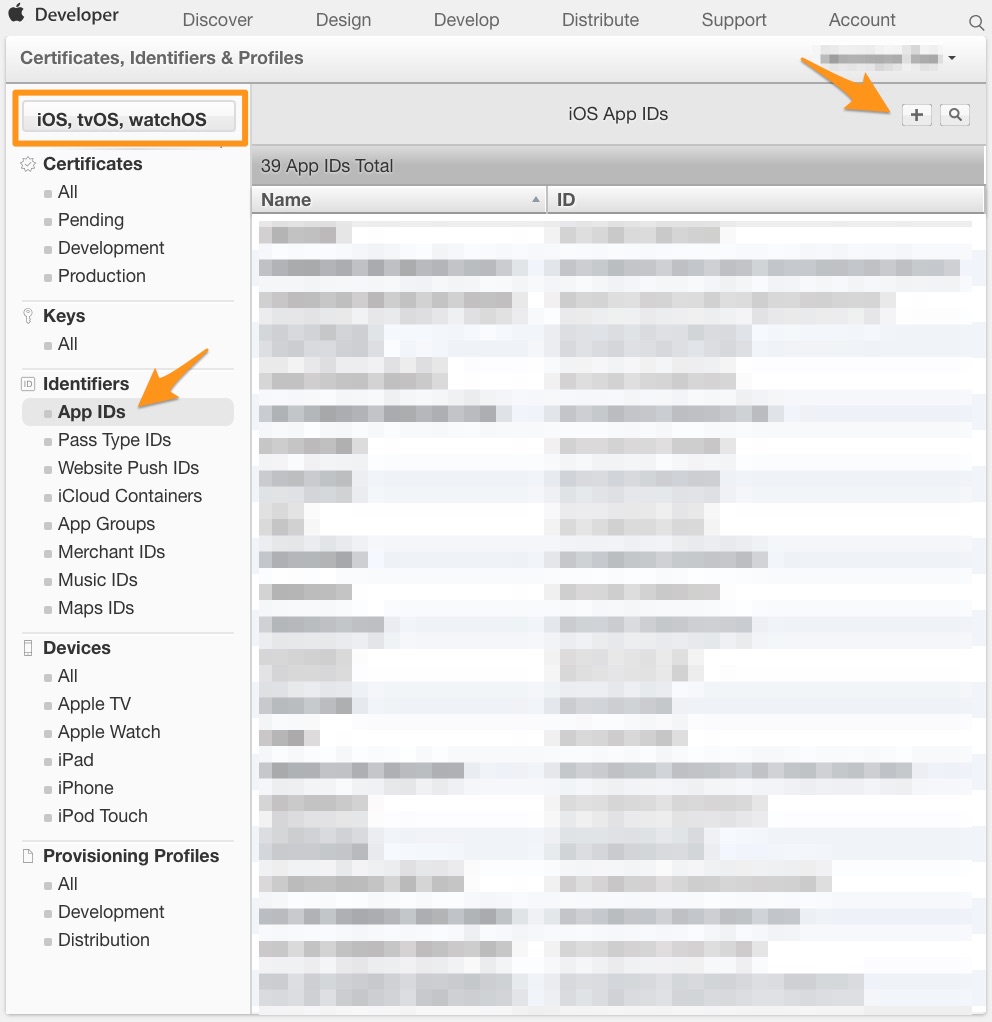
Go to the Apple Developer Member Center website and select "Certificates, Identifiers & Profiles".

On the left-hand side navigation bar, look for your project iOS App IDs in "iOS, tvOS, watchOS" > "Identifiers" > "App IDs". If your app is not on the list, you can click the "+" button to create a new app ID. If you need some help check out the Apple doc for further information.
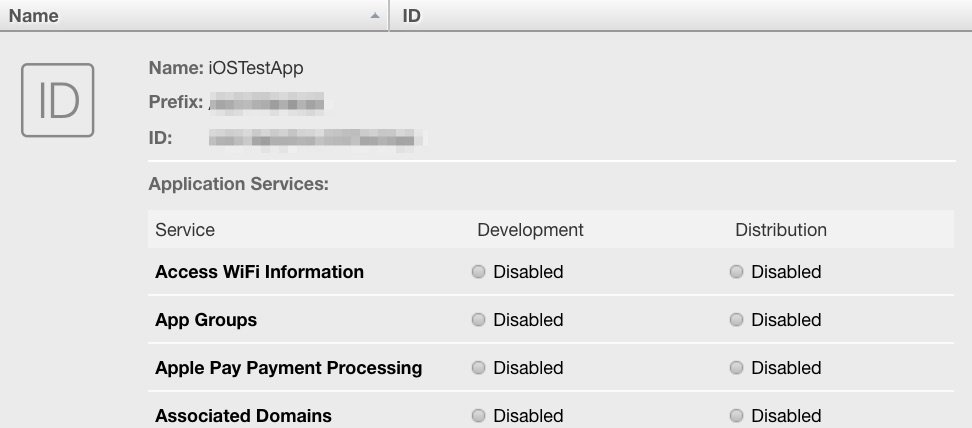
Click on your app to open the "Settings" menu, scroll down to the bottom, and click "Edit".
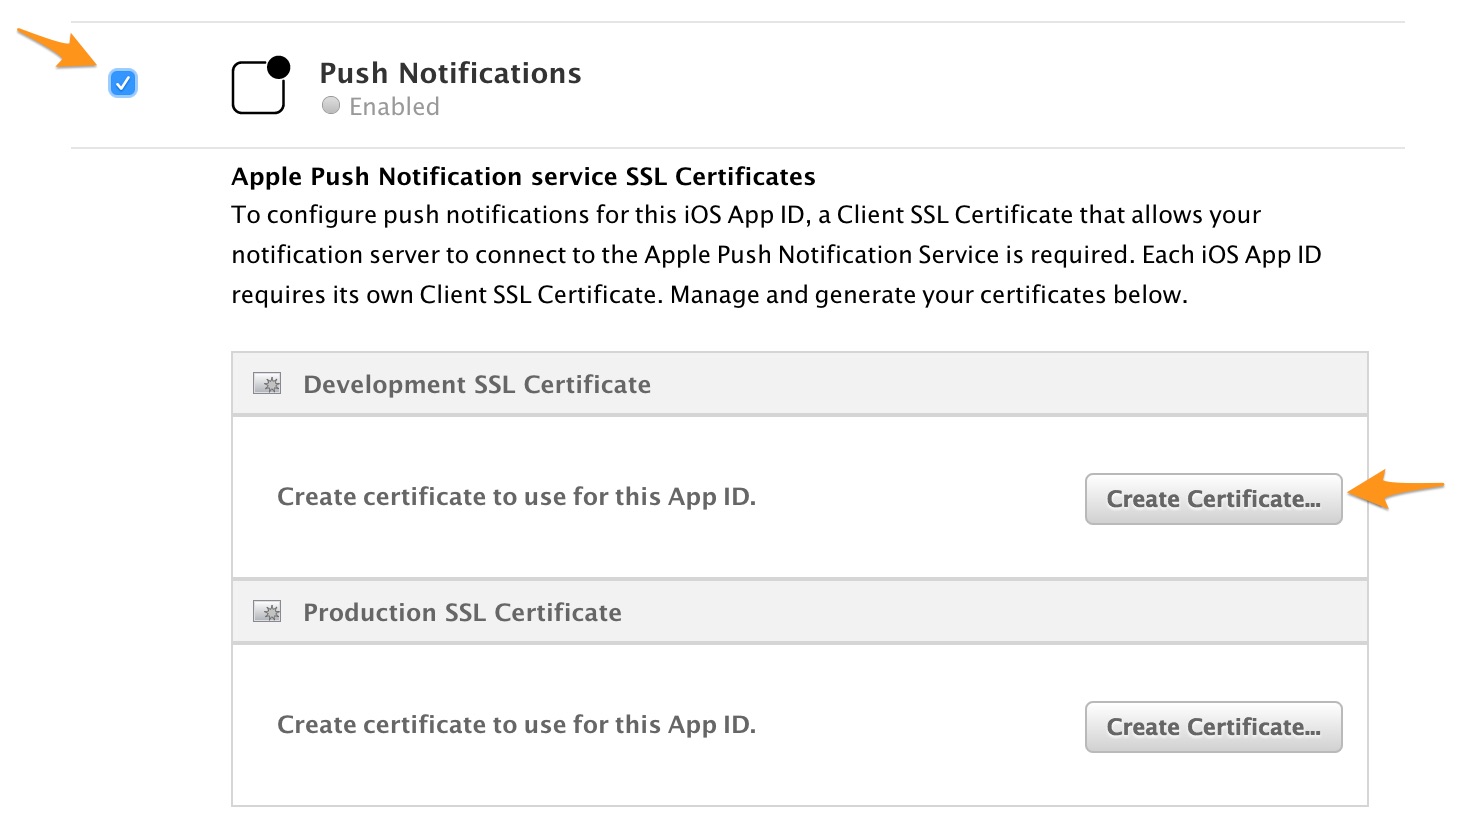
Now that you are on the "Edit" screen, scroll down until you see "Push Notifications". Click the box to enable them. We will now create certificates for both development and production.
Let's start with development! Click "Create Certificate" under Development SSL Certificate to begin generating your cert.
When you're on the next screen, press "Continue".
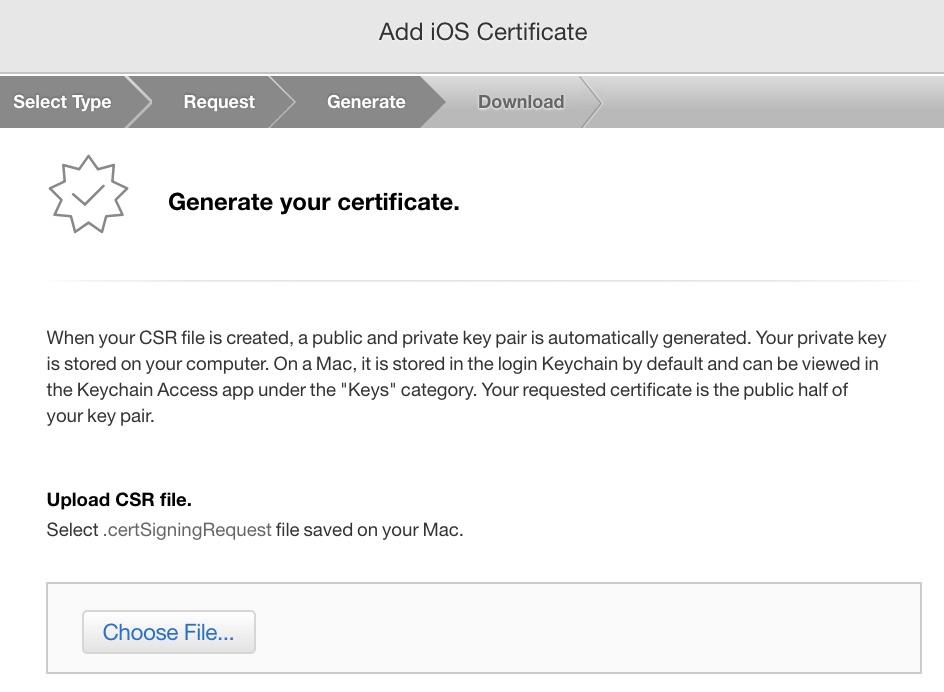
Now, you need to upload the CSR file you created earlier. Press "Choose File" and find the ".certSigningRequest" file saved to your Mac.
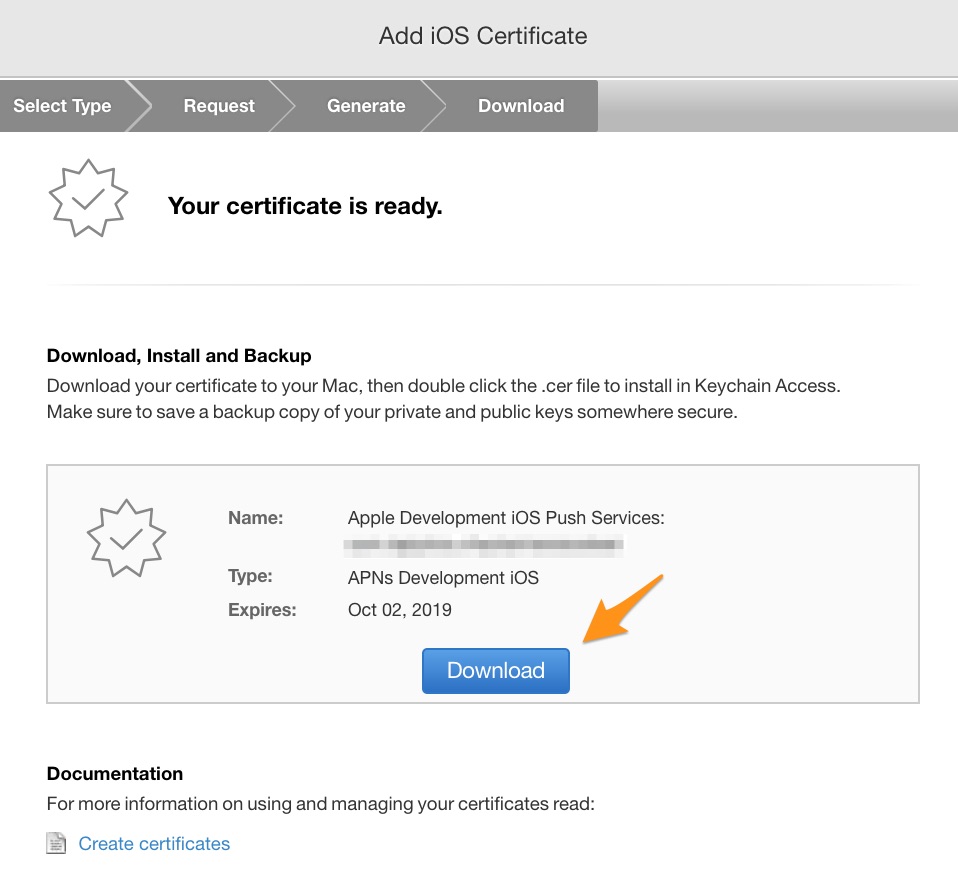
Once the upload completes, press "Generate File" to create your certificate. Download and open the file to save your development certificate to your keychain.
Now that you have your development certificate generated, you to need to create one for production. Repeat the above steps to create a production SSL certificate.
Once you've generated both the development and production certificates, venture back to your Keychain so you can export your certs and upload them to Taplytics.
When you are in Keychain, go to "My Certificates". Find your newly created development certificate, right click, and hit "Export".
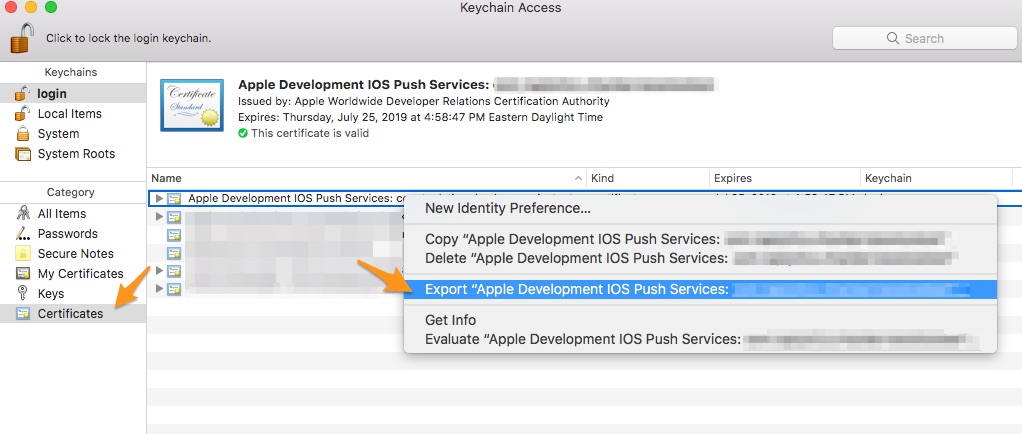
Save the ".p12" file to your computer. The modal that appears will ask you to create a password to protect your exported items. In order to upload to Taplytics properly, leave the password field empty. Instead, just press "OK".
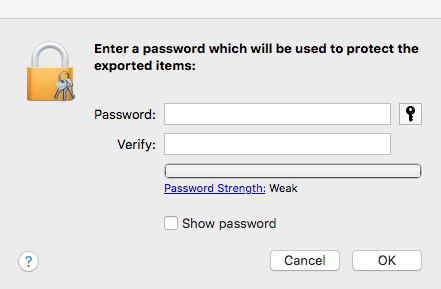
Enter your Keychain password in order to export your files.
Locate your production certificate in the same list. Once you locate it, export it the same way as the one for development. Remember to change the name of your export file so you don't replace the one you just created for development.
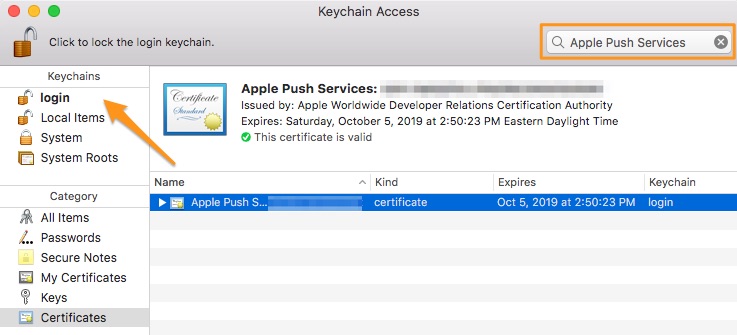
If Keychain Access is giving you grief and your production certificate is not in your list, try searching for "Apple Push Services" in the search window. Once you find it, drag your file to "login" and you should now be able to export your production certificate from Login—My Certificates.
3. Upload your certificates to Taplytics
Login to your project in Taplytics and navigate to "Settings" > "Push Notifications Settings". Click the upload button and select your development and production certificates to upload.
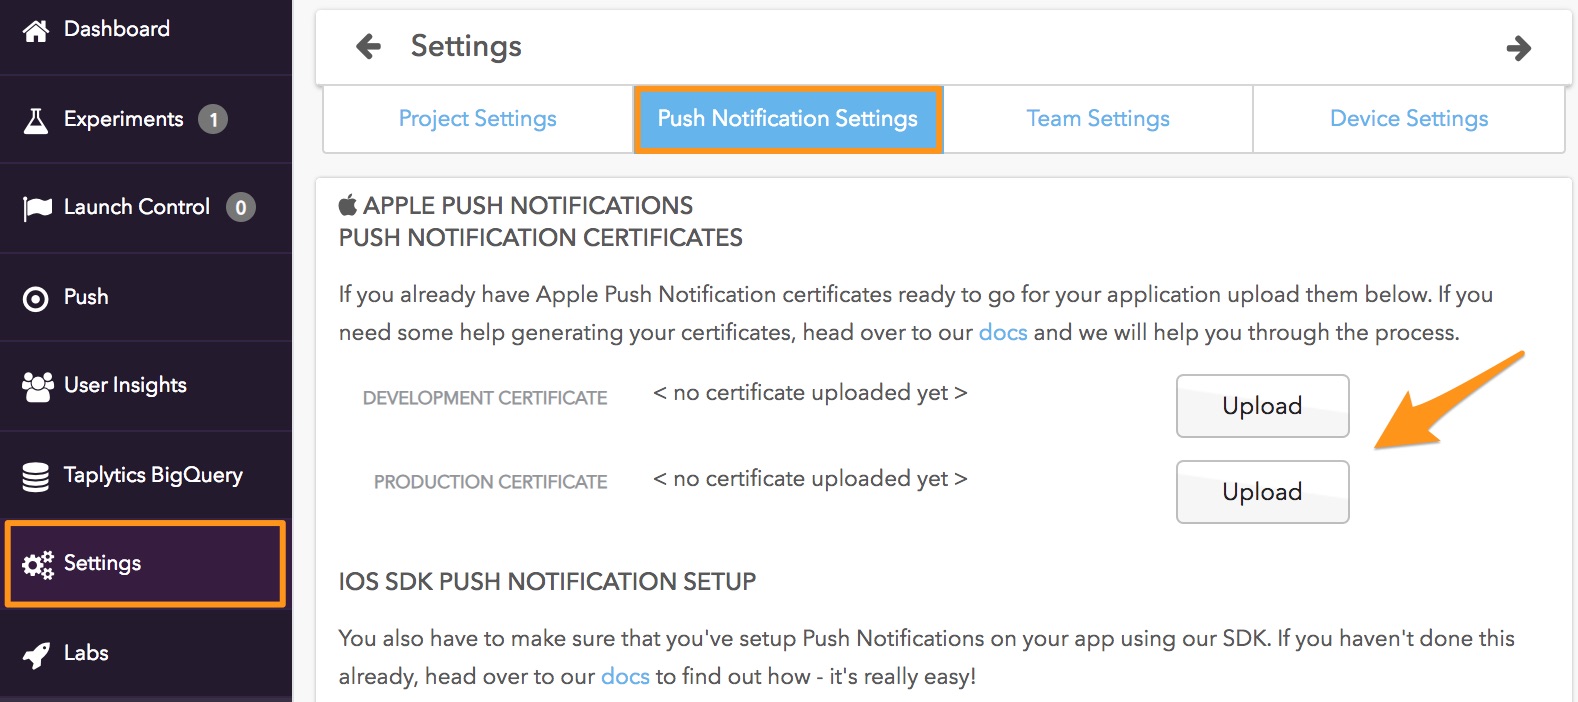
Once the upload completes, your screen will display both of your certificates.
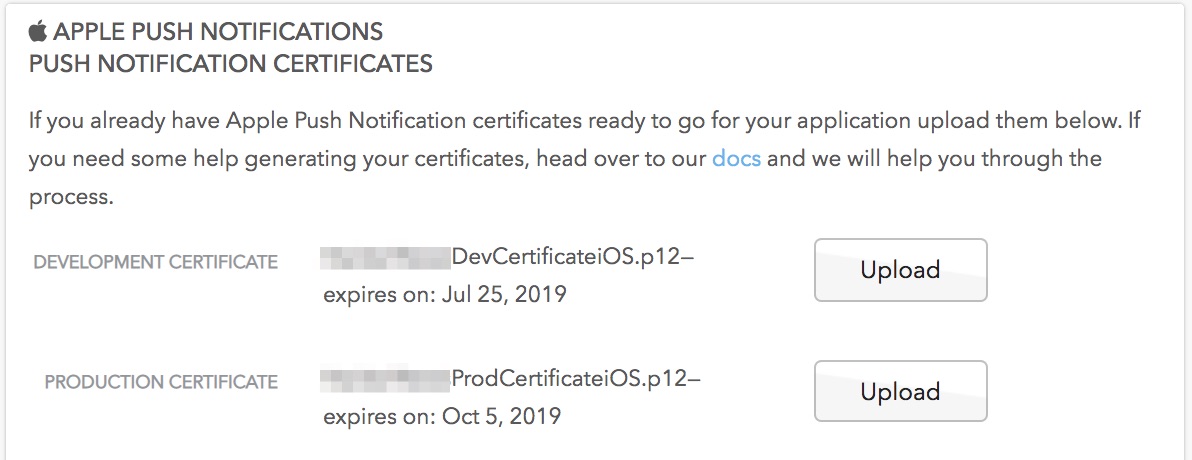
Great Job! You can now send push notifications to iOS devices using Taplytics!
Firebase Cloud Messaging Credentials
Before you can get started using Taplytics push notifications for Android devices, you need to upload your Firebase Cloud Messaging (GCM) credentials.
1. Getting your FCM credentials
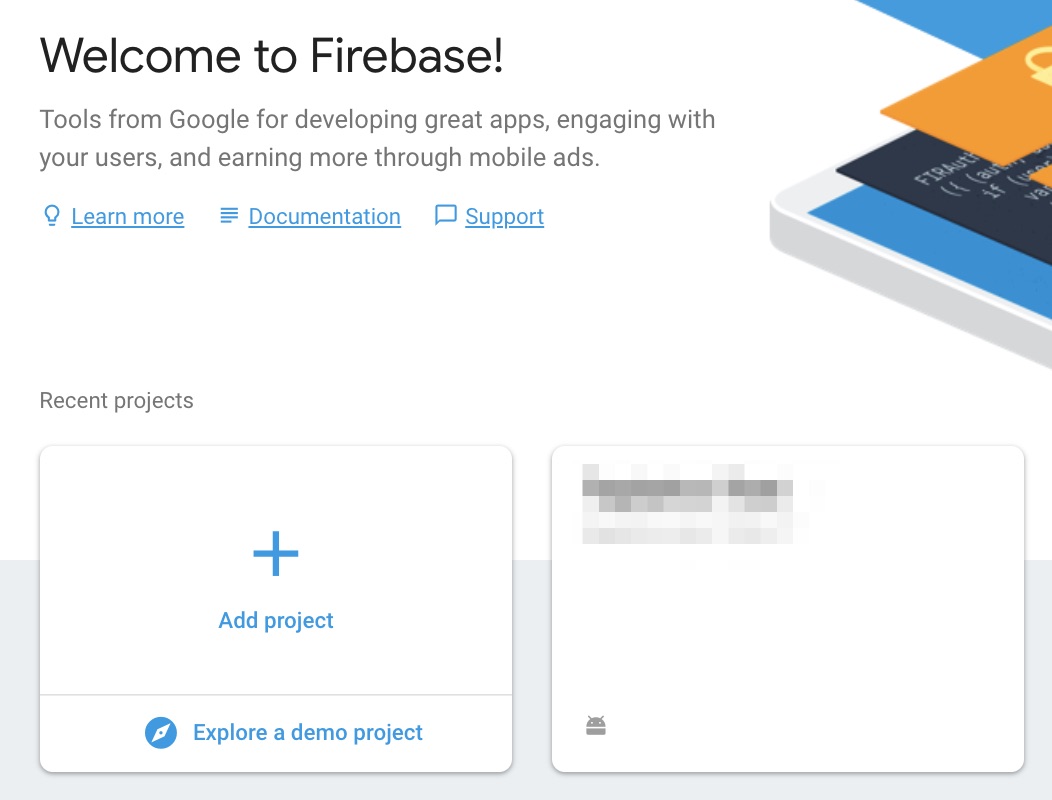
First, head over to the Firebase Console. If your project is already in Firebase, simply enter that project. Otherwise, click "Add project".
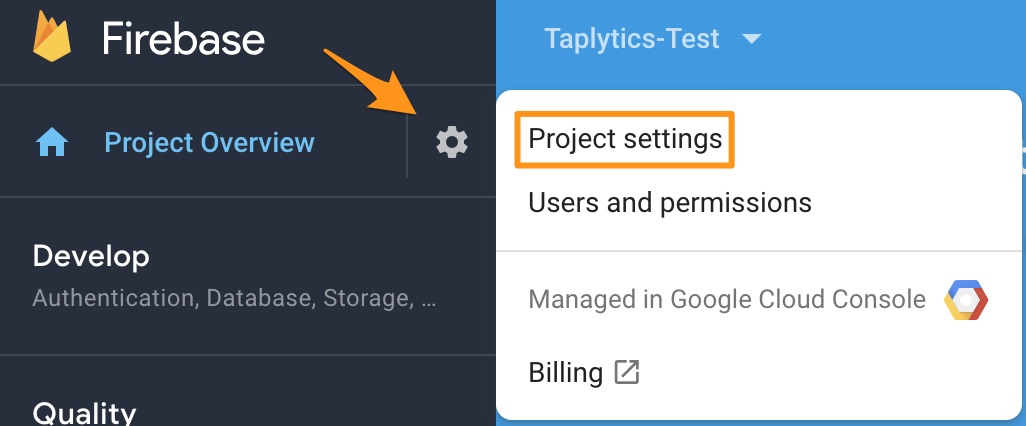
Navigate to your project's settings.
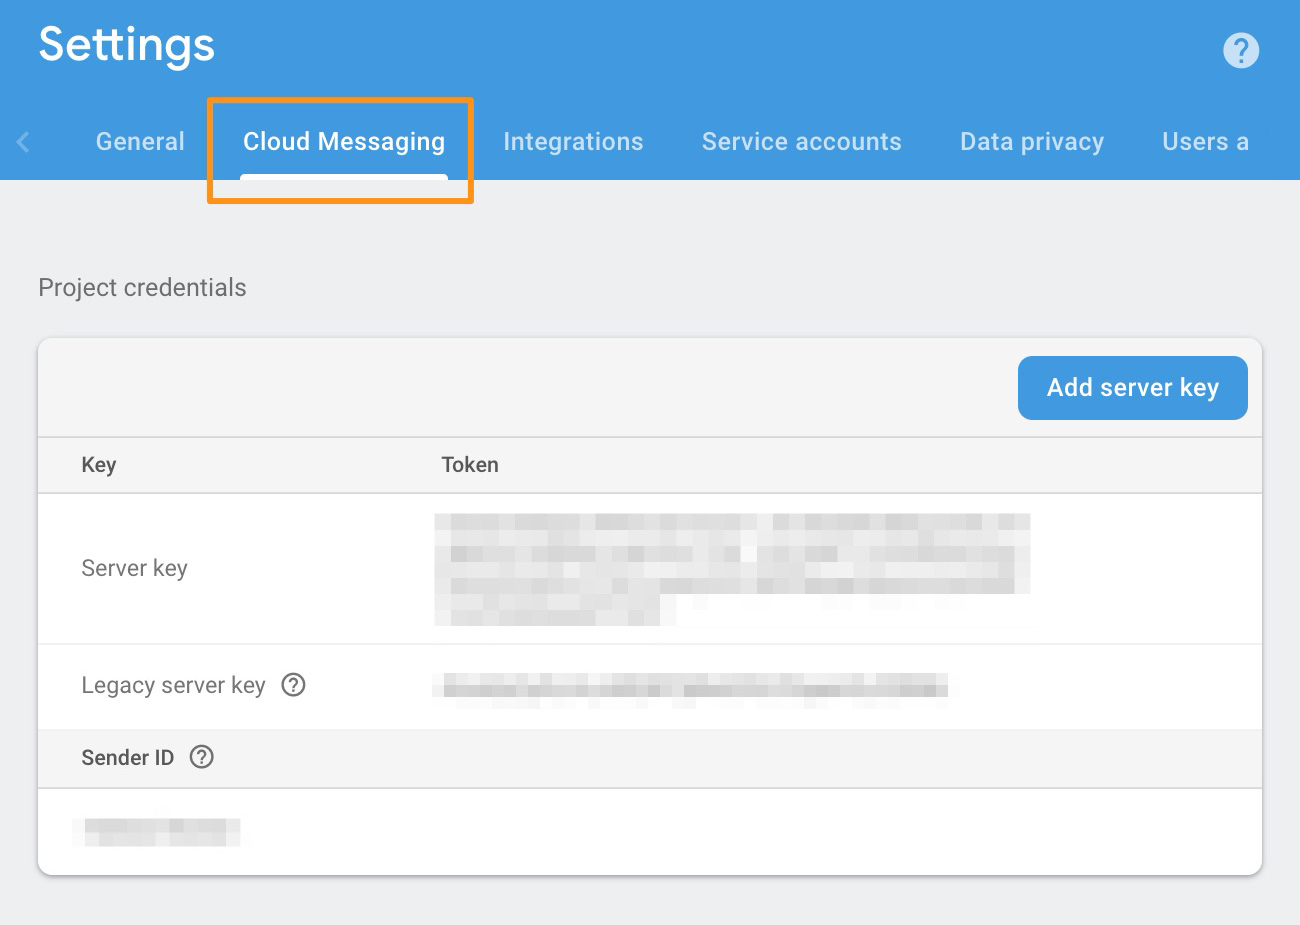
From here, switch to the "Cloud Messaging" tab where you will find your project "Server Key" and "Sender ID"
2. Uploading your FCM credentials
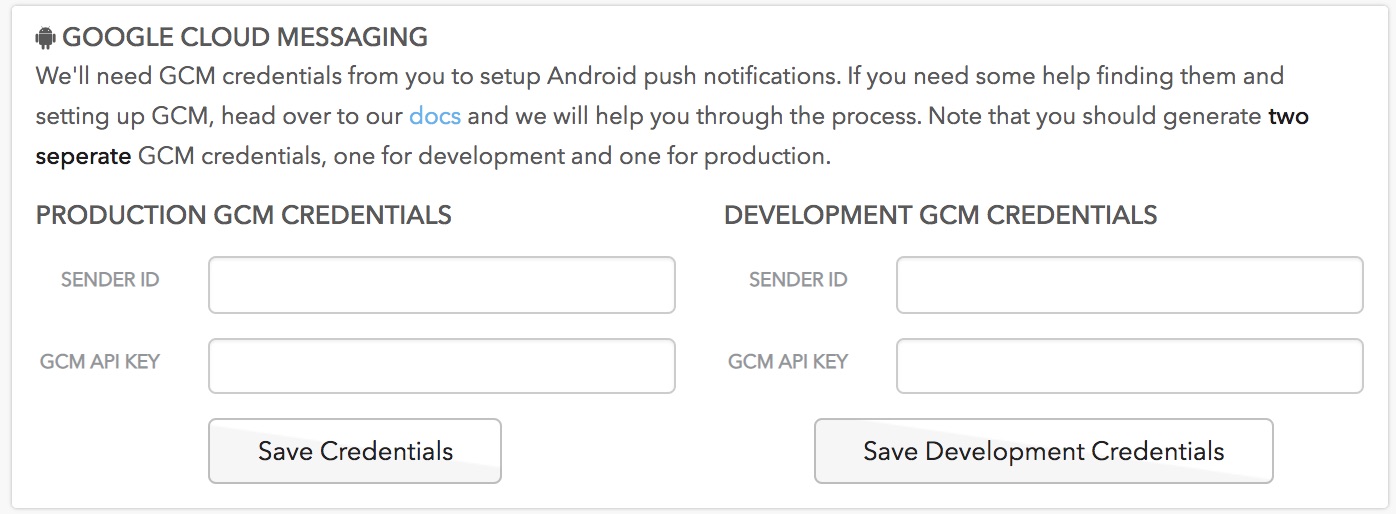
Login to your project in Taplytics and navigate to "Settings" > "Push Notifications Settings". Then go down to the 'Google Cloud Messaging' section and copy/paste your "Server Key" in the "GCM API Key" field and your "Sender ID" in the "Sender ID" field. Finally, click 'Save Credentials' and you're on your way to sending Push Notifications to Android devices!
Updated over 5 years ago
