1a. How to Use the Web Visual Editor
To start, ensure that the Taplytics JS SDK has been installed on your website and you have a project set up.
Visual Web Editor
Making changes to your website is easy using Taplytics Visual Web Editing tool.
The first step get the Taplytics Chrome Extension installed on your browser you're good to go! Please email [email protected] in order to have yourself added to the list for access. Once that's complete you'll be able to start creating visual edits to your website.
Note: please provide a Google account email address and be logged in Chrome with that email address to be able to use Taplytics Chrome Extension.
Create your experiment
Once you're on the Taplytics Dashboard navigate to the "Create New Experiment" button.

Setup your experiment
1. Make visual edits
On the next screen you'll be prompted to put your website URL into the Dashboard. Go ahead and click the "Start Editing" button once it lights up green!

You'll then be redirected to your website! Once there you'll see the a border around the screen that let's you know you're now using the visual editing tool.
There are a few things to note about this once you've landed on the first screen.

1 : Add new variations or switch between different variations to edit here.
2 : These buttons open the CSS and JavaScript editors (left to right).
3 : Toggle between Browse and Edit to navigate the page and make edits to the page
4 : Our AI tool Dexter Smart AI, provides helpful hints and suggestions for creating effective and powerful experiments.
Once you've navigated to the page you'd like to make changes on simply switch the bar over to "Live Edit" mode and you'll notice that as you hover over different parts of the webpage a box will show up around the corresponding element.
To start making changes, click on one of these boxes! Once you've clicked an "Editing Text" box will appear. This is where you will make edits to your website.
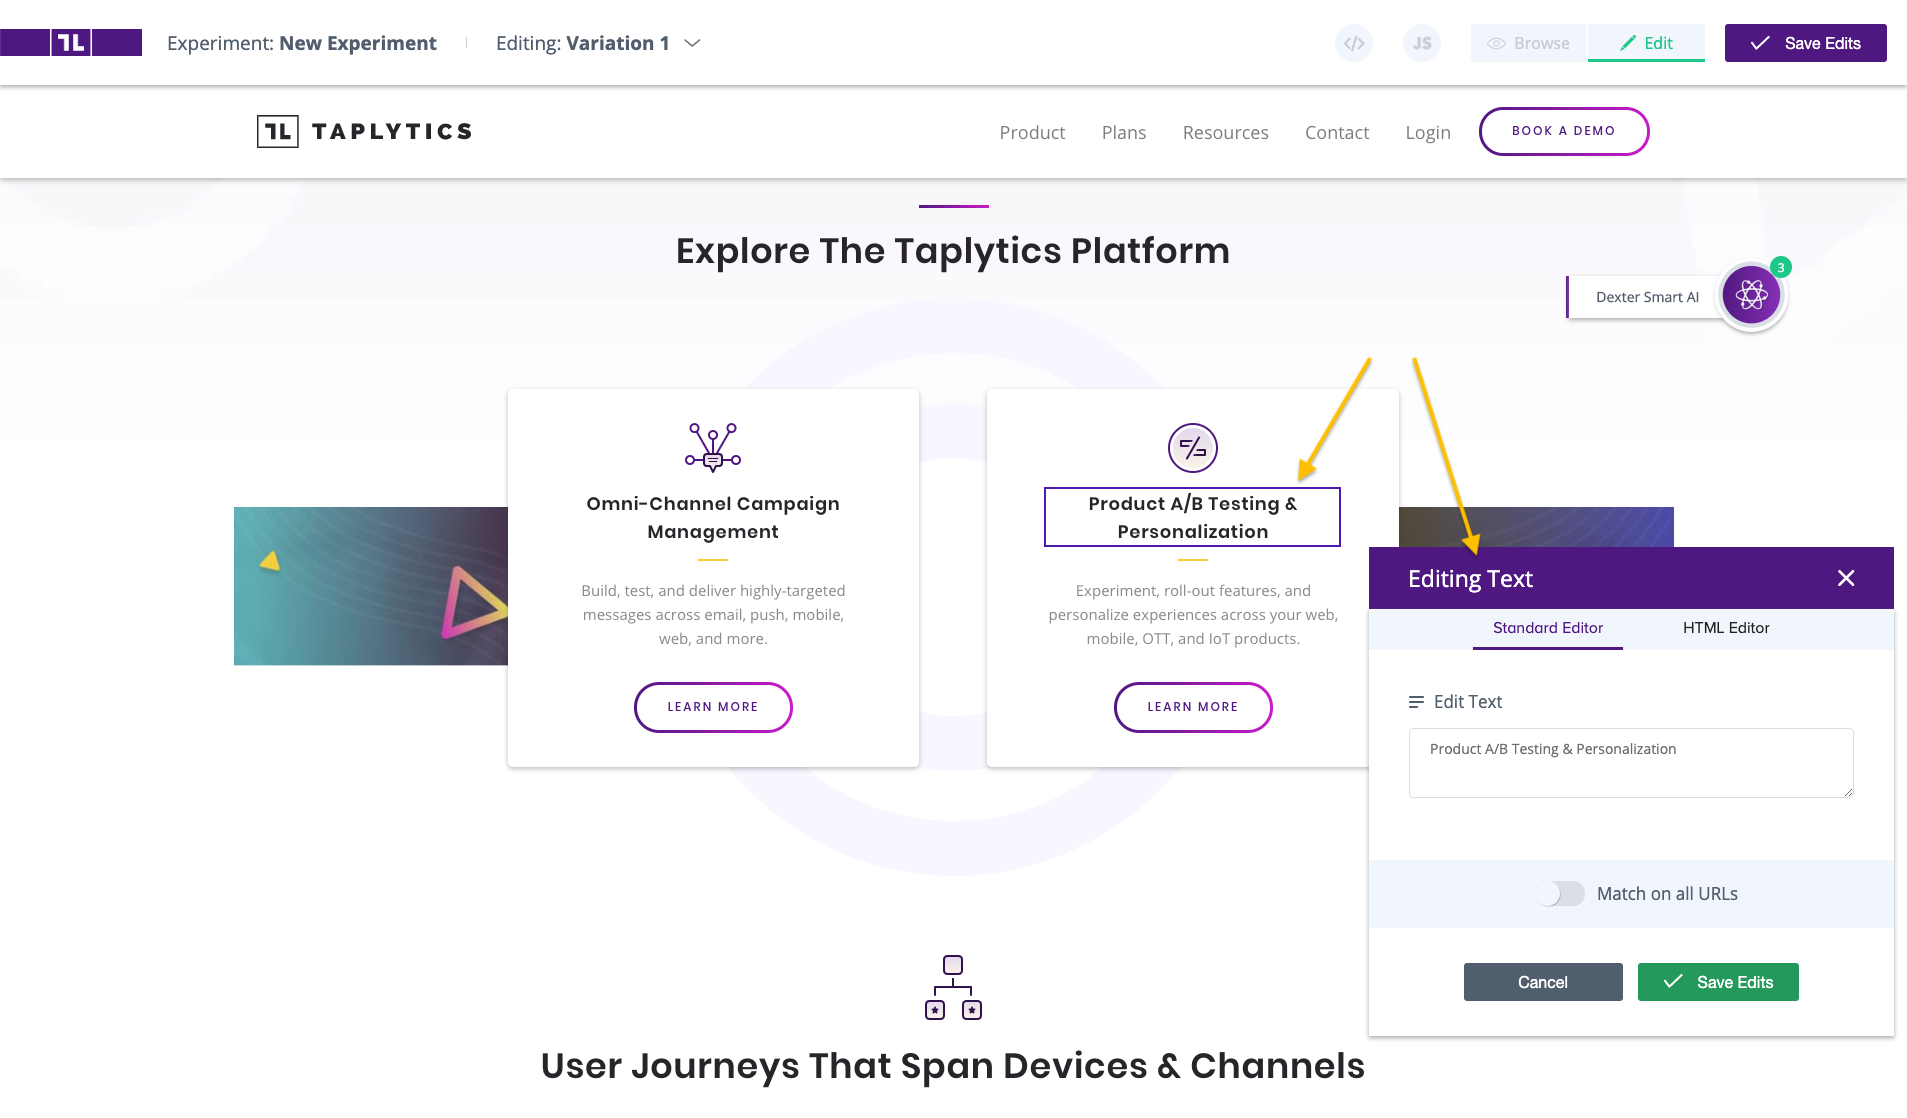
You can simply update the text within the Text box or click on Advanced to see the actual HTML. If you'd like to update the font or colour - simply add the correct CSS modifiers to enable the changes you'd like.
There is an option to "Match on all URL's" - you can apply the change to match on base URL and it will apply to all other pages with the same base URL.
Don't forget to hit save!
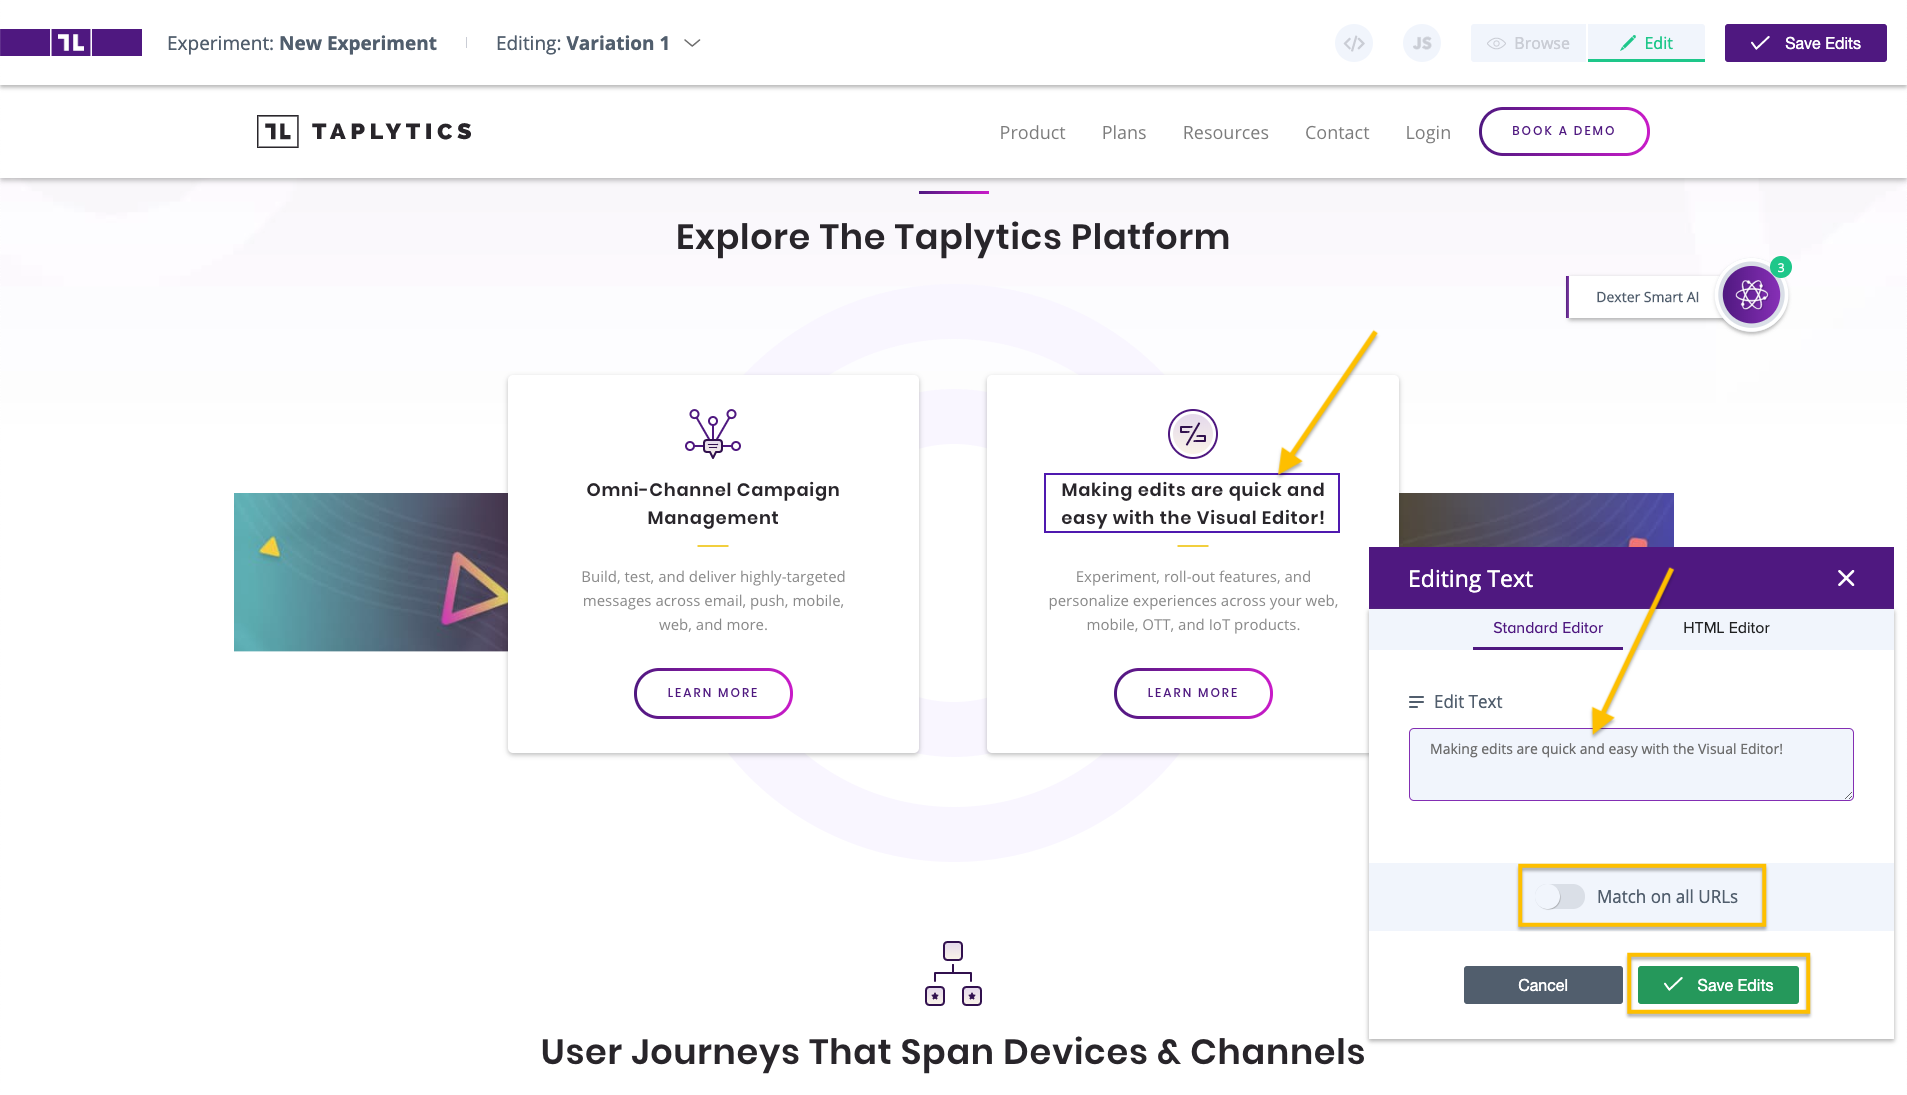
Once all your changes have been made and you're done adding variations hit the "Save Edits" button in the top right hand corner of the screen and you'll be taken back to the Taplytics Experimentation Dashboard.
You can also use the web editor to swap images! Simply select the image and update the URL that you'd like to swap the image for.


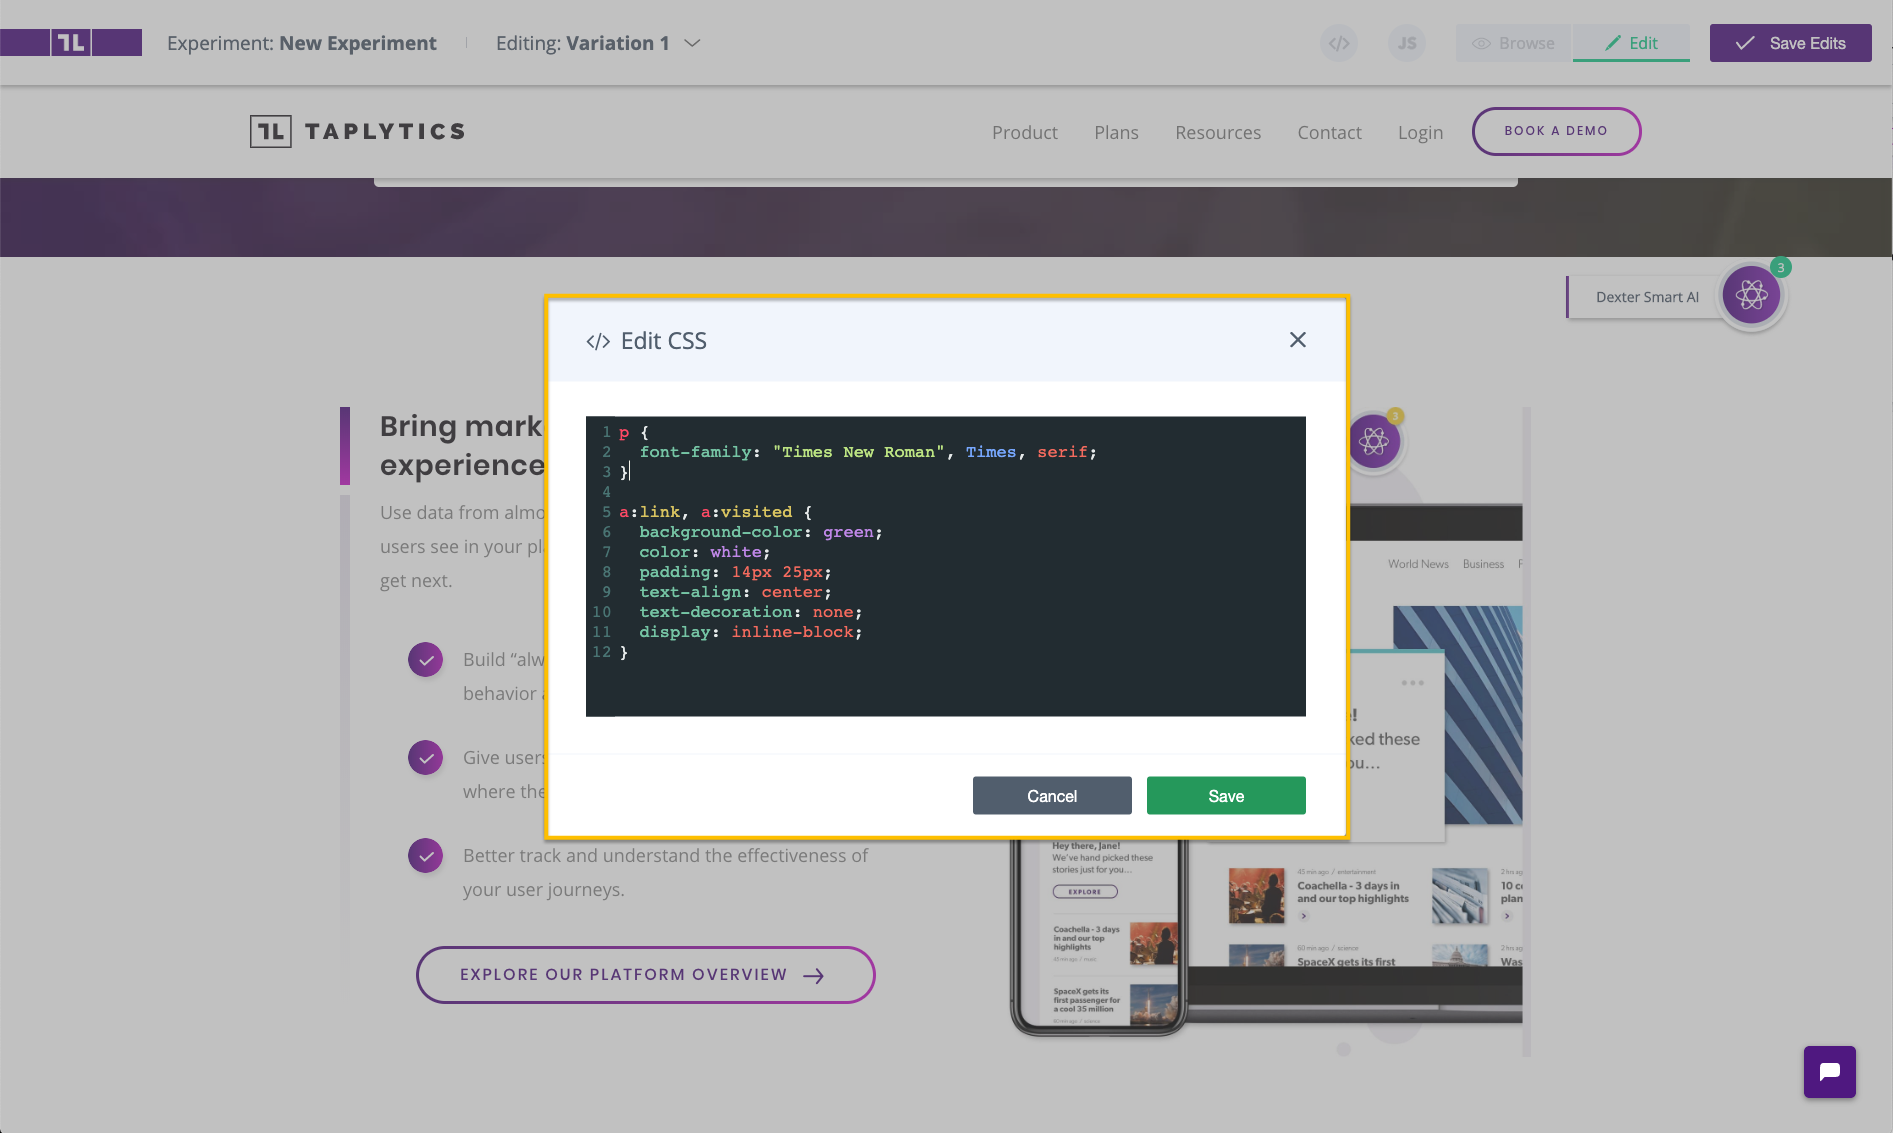
CSS Editor
Use the editor to make CSS changes to the page and its elements. You may always come back to a variation and change the CSS you’ve written.
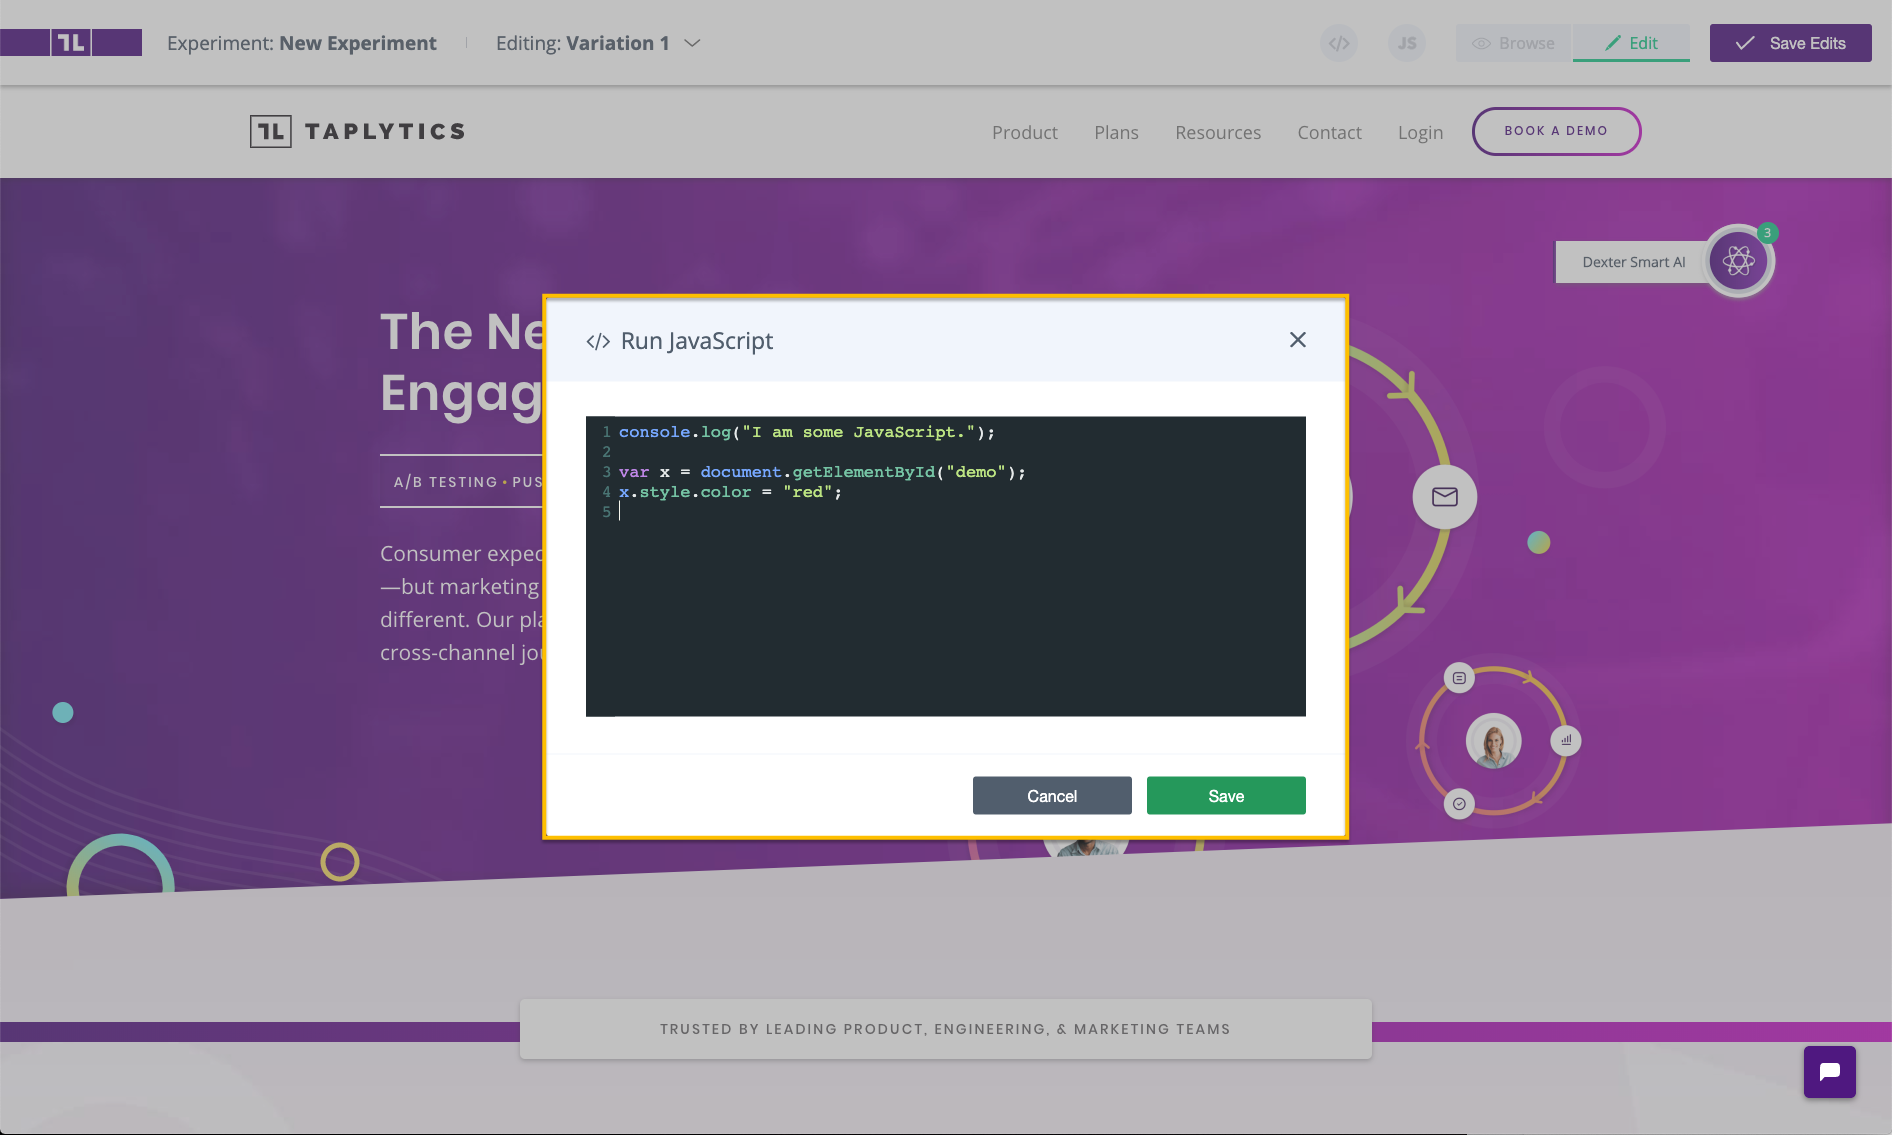
JavaScript Editor
Use this editor to write and run JavaScript. The script will be executed upon hitting Save. Note: To cancel changes made by the JS editor, you may need to delete the variation.
That's it! You've created your first visual experiment using the Taplytics Web Visual Editor!
Keep moving through the experiment work flow!
What's next? Move to the Code Blocks and Variables tab or start creating goals!
-
Leveraging Code Blocks and Variables (Web Code-Based Experiments)
-
Creating Goals
-
Specifying the Audience Distribution
-
Reviewing the experiment set up and launching it to users!
Updated over 5 years ago
