How to Create a Static Push Notification
Sending push notifications with Taplytics is super easy! In this push guide we'll walk through the most basic type of notification you can send, a Static Push Notification.
What are Static Pushes?
Have you ever wondered how your app sent you the exact message you needed to hear in your particular circumstances? Marketers probably used push notifications to target you with a personalized message that prompted you to take some action. The goal of targeted push notifications is to usually to achieve a goal, typically one of the following: make more purchases, subscribe to services or to entice you to explore the app.
Push notifications are essentially messages sent from the app to users, and when used effectively, they can be an extremely useful took for personalization.
On the Taplytics platform, push notification come in three different types and the most basic is a static push. On the most simple level, the term ‘push notification’ refers to this one-time message that you send to your users.
Examples of Static Pushes:
- Change Notifications: Notify users of important changes made to your app that might affect them in the long run
- Have you added a new feature? Changed a flow? Added in a new line of products? Let your customers know!
- In-app Activity: Let your users know what is going on within their app, such liking their photo or new episodes of their favourite series
- Tips and Tutorial: Let your users know how they can better use the features within your app by highlighting ones they haven’t used yet, or sharing information on how they can save more
- Limited Time Offer Notifications: A daily or hourly countdown to the end of an offer or sale will remind users and create an urgency for them to make a purchase
- One-Time Sales: Catch your users’ attention with a bold push with a sale they can’t resist. Create urgency by setting a time limit, or make your push stand out by adding images or emojis
- Live event Notifications: Let your users know that there is a live event happening within your app. Maybe a game show or a live feed of a video perhaps
Creating a Static Push Notification
Check out our Push Notification article that walks you through how to set up your first Push Notification with Taplytics step by step.
Rich Push Notifications
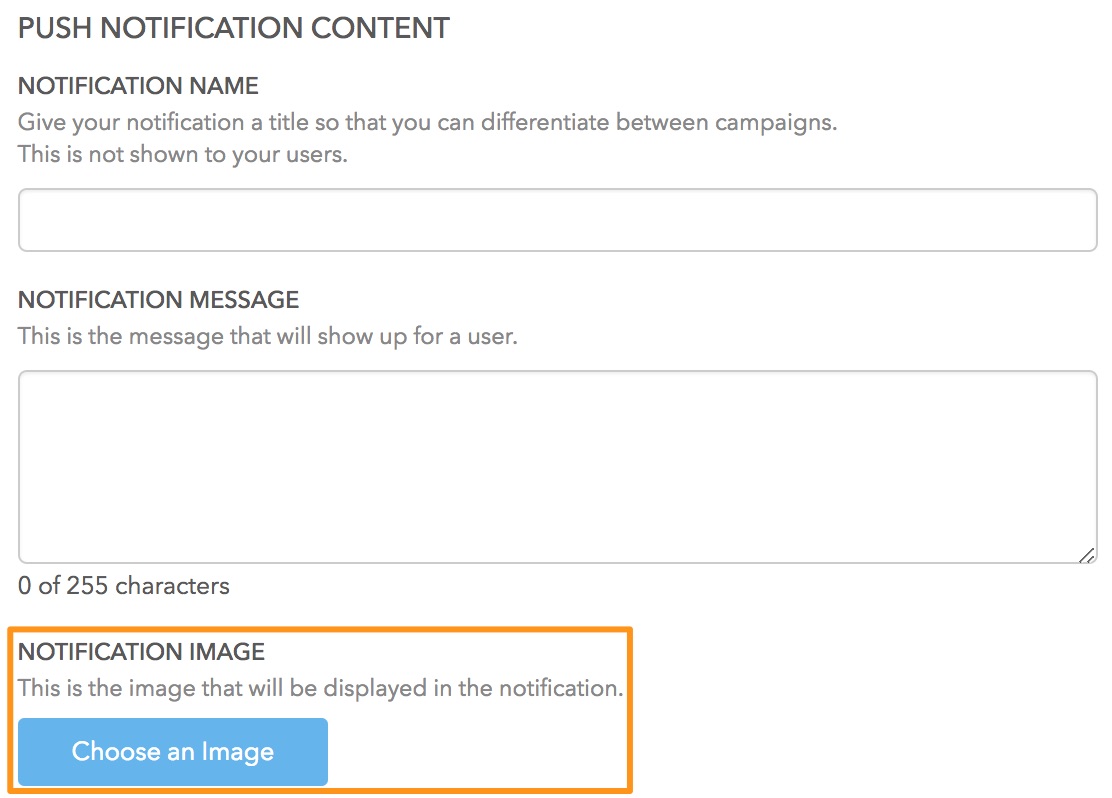
A picture is worth a thousand words! For iOS 10+ and Android 4.1+, we’ve made Rich Push Notifications available to further engage and ultimately build a deeper relationship with your users through images in your push notification.
Good to know:
- We currently support JPEG and PNG images with a max image size of 10mb. Images are not downscaled and if an image is sent, the full file size of the crop will be used.
- Android will automatically crop all images to be a 2:1 aspect ratio, scaling if necessary.
- Use simple image file names: no symbols (specifically no %) please!

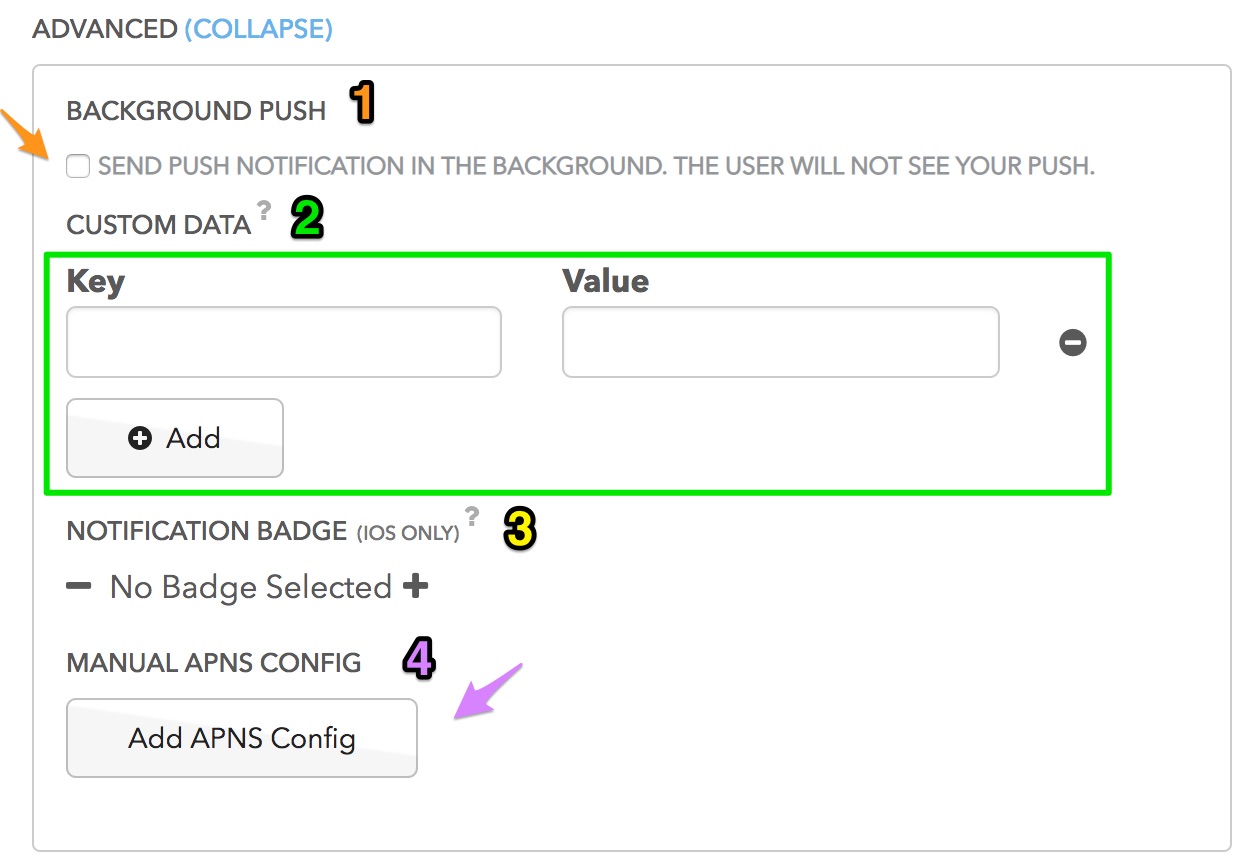
Advanced Settings

1. Background Push (also called Silent Push)
With silent pushes, users don't see any indication that you've pinged the device. Silent pushes can also be sent to all users, even if they have disabled regular push notifications. They are designed to keep your app's data up-to-date by providing a way to "wake up" the app to refresh the data in the background.
A typical use case for Silent Pushes is to track the number of app uninstalls or push disabled since the last ping.
2. Custom Data
You can add custom data to send customized push notification. For example, you can change the push title which by default would be your app name, disable your app icon, or deep link to a specific screen of your app.
- Here's an article about Deeplinking
- Check the Android docs about Custom Data here
3. Notification Badge (for iOS only)
What is an iOS notification badge? Check the Apple docs here.
4. Manual APNS Config (for iOS only)
What is it? The way push notifications actually work is that we take all of the information in the dashboard and put it into an APS payload. An APS payload is what the iOS system uses to generate and show a push notification. APS payloads and their options are defined here.
We've created an option that allows for the upload of the APS payload directly onto the dashboard.
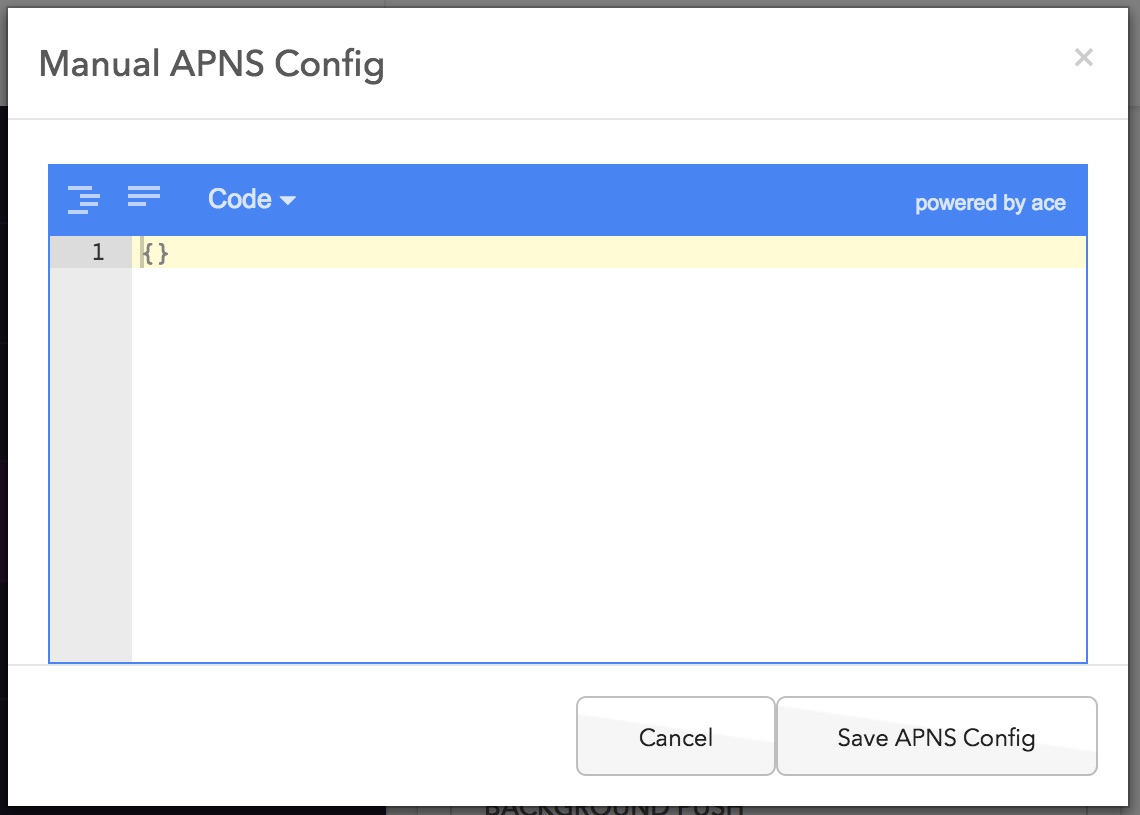
How does it work? Simply click on "Add APNS Config", the below screen will pop-up.

Then, you paste in anything that would be inside the APS tag including custom data you’d like to include. For example:
{
        "alert": {
            "body": "Team A [1]-0 Team B",
            "title": "Score"
        },
        "category": "score",
        "mutable-content" : 1,
    "custom": {
        "id": 12345,
        "player_id" : 54321,
        "event_id": 99999,
        "topic": "score"
    }
}
"Save APNS Config" and that's it, you're all set to schedule your push.
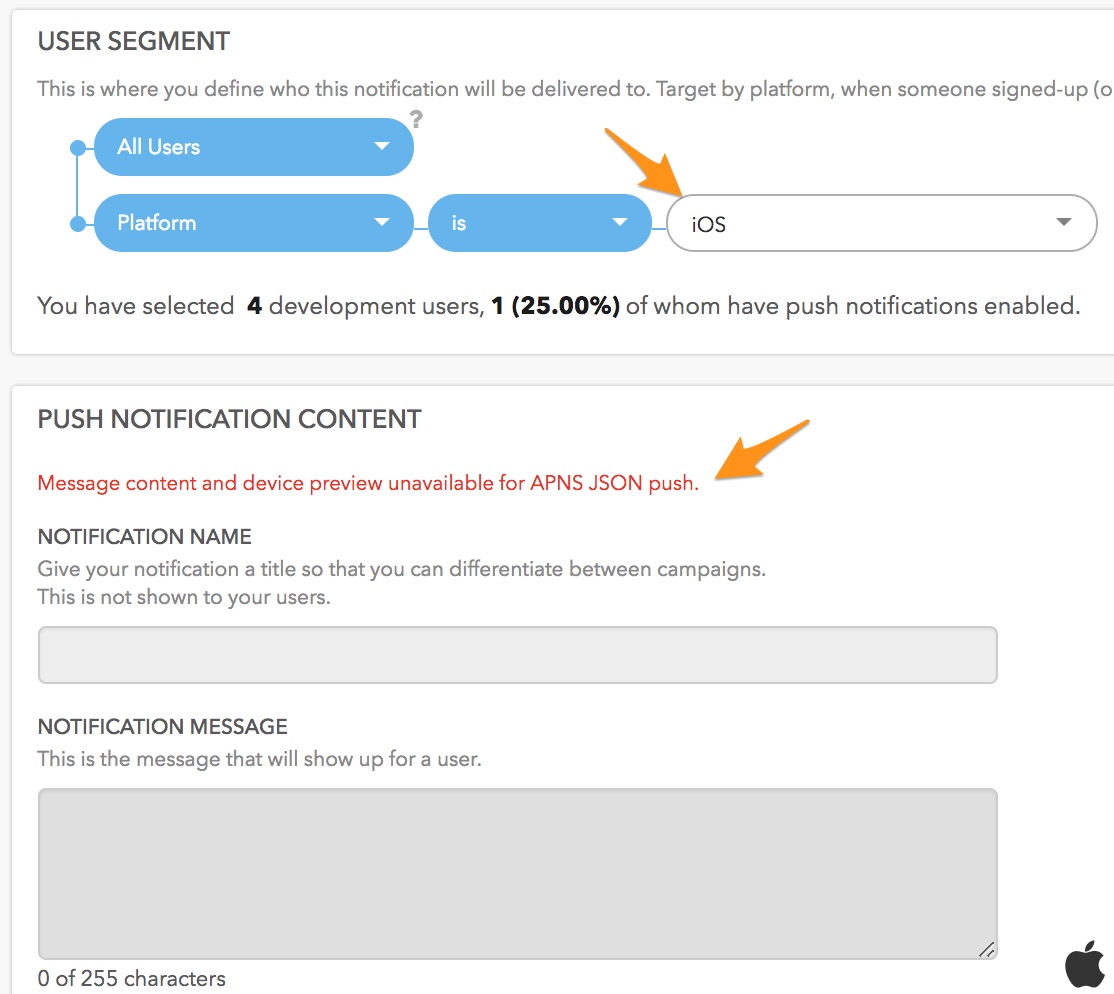
Note that after uploading the APS payload, the User Segment will target iOS users only and the "Push Notification Content" section will be greyed out as this is a feature available for iOS only and we do not support message content and device preview yet.

Updated over 6 years ago
