3. How to Create an Experiment Goal
Whether your goal is to get more users, increase revenue, or something completely different, creating a goal within an experiment is the way to track that metric.
Goals allow you to gauge the success of your experiment based on the KPI's you're looking to better understand. For example:
- Are you looking to increase engagement?
- Do you want more users to convert on a purchase screen or simply want more sign-ups?
- Are you trying to increase subscriptions?
These questions will help you define the types of goals to set up before your experiment is set up. Once you've outlined what you're hoping to accomplish - you can begin creating goals on the Taplytics Dashboard.
For a video tutorial on how to create an experiment goal, check out our available resources here.
Create a Taplytics Goal
Begin by navigating to the Goals tab of the experiment creation flow:
In this example we will create a goal to track the successful completion of a purchase event.
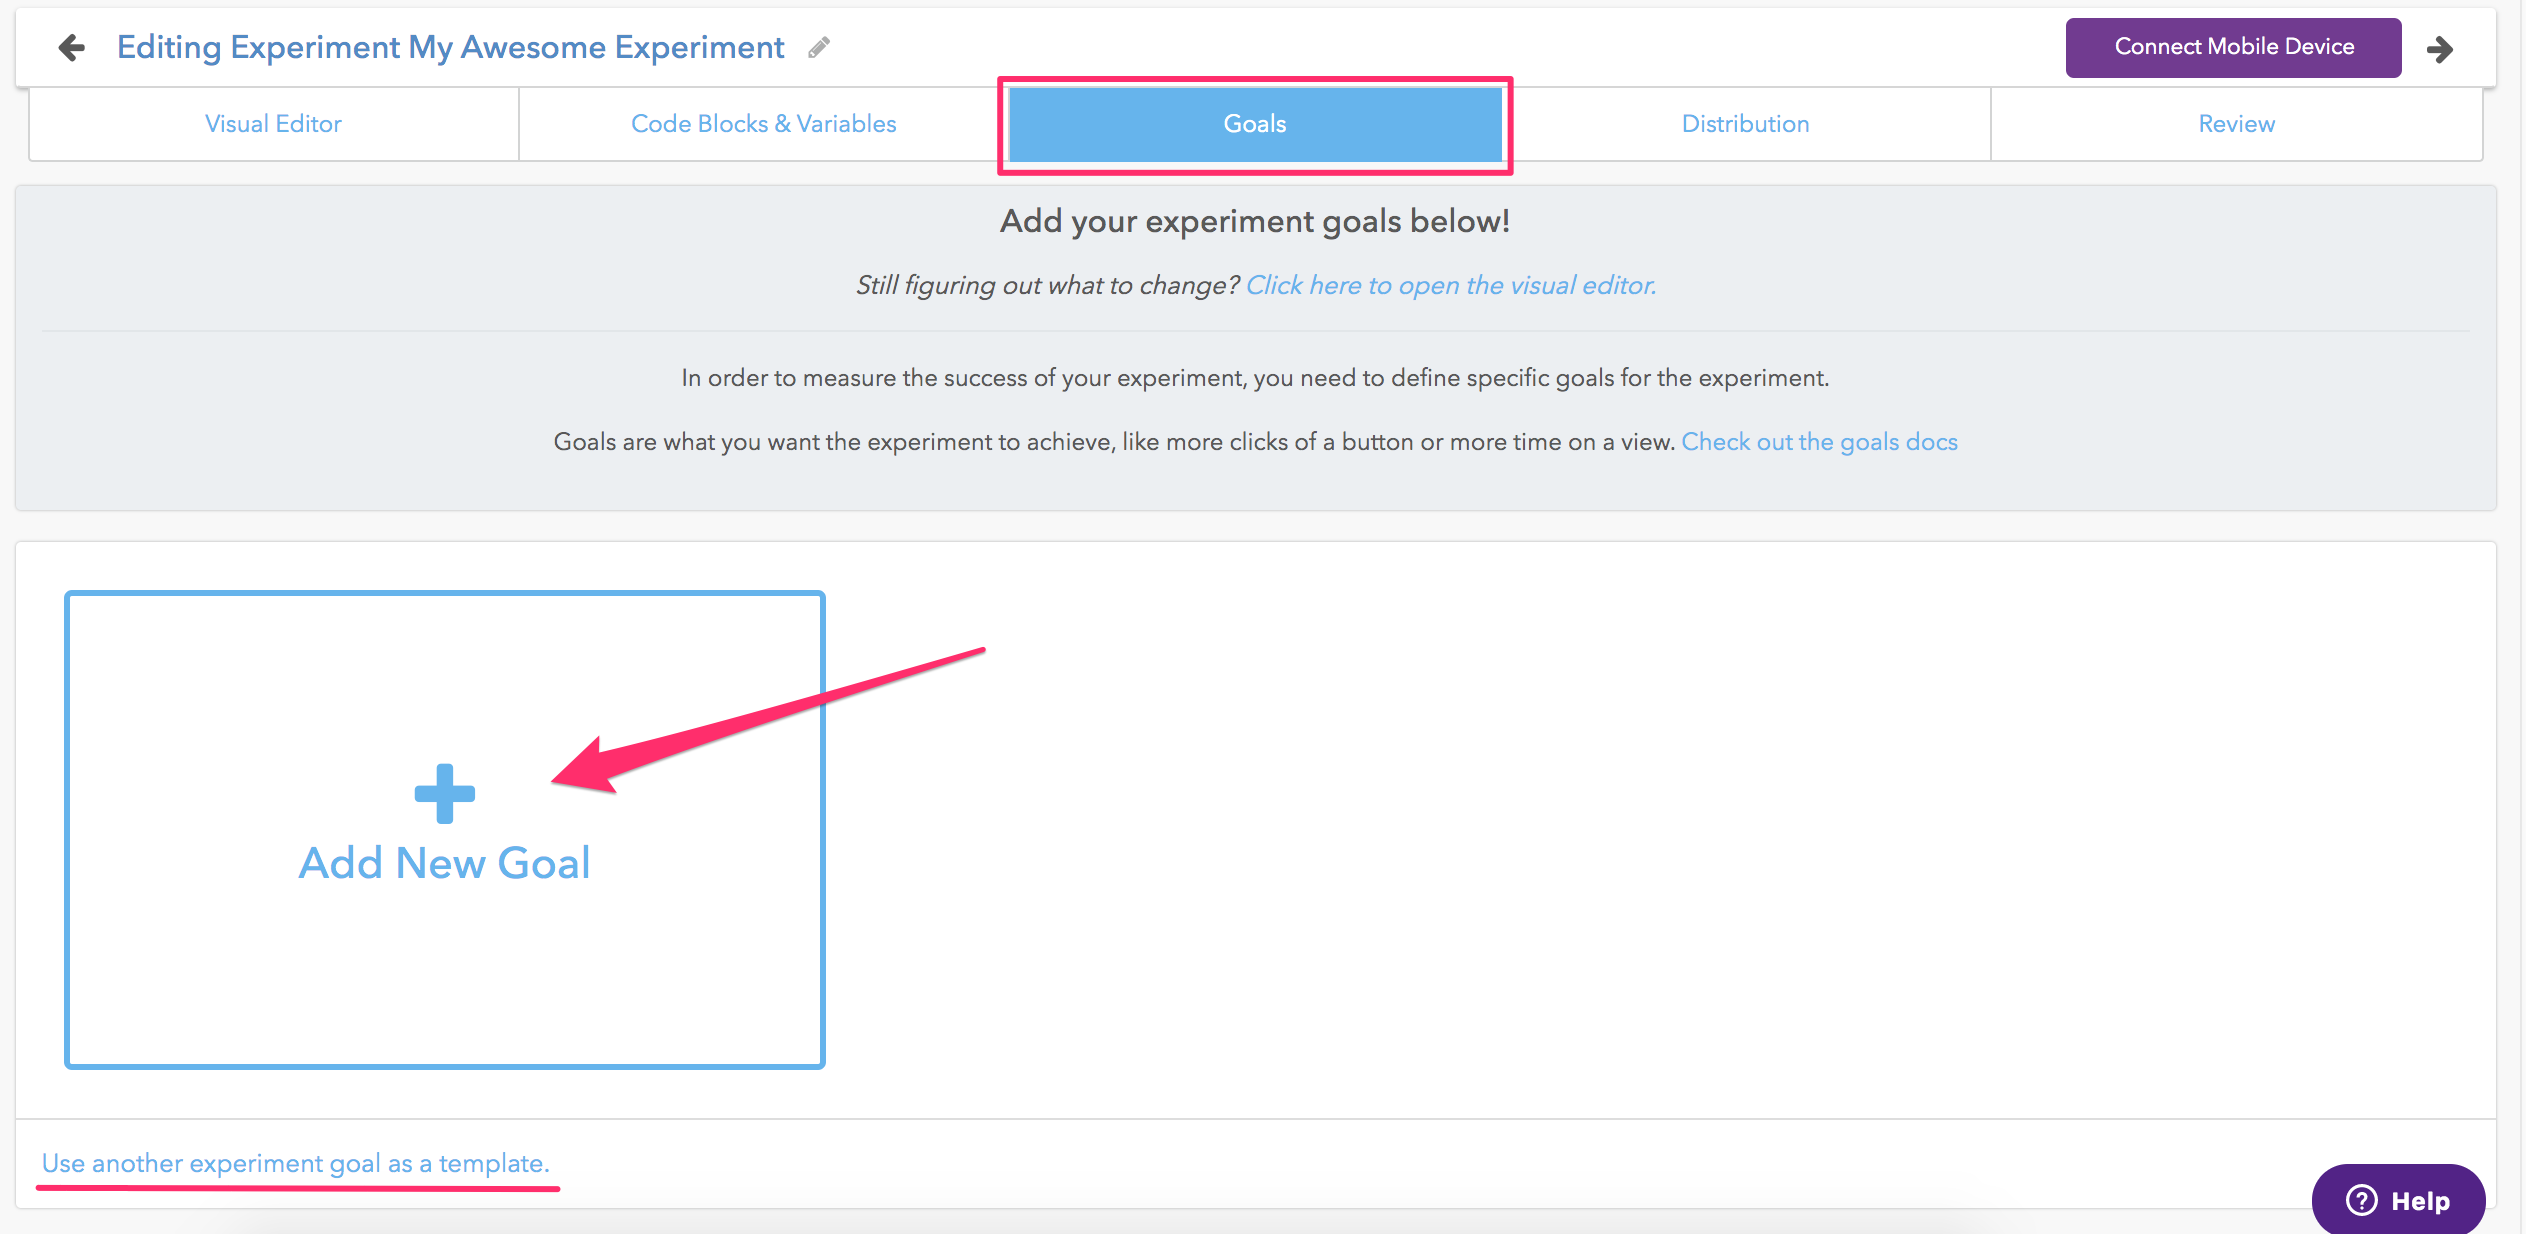
Click Add New Goal.
At the bottom of the page you will see a link to Use another experiment goal as a template. This allows you to leverage already created goals from other experiments.
But assuming you've never created a goal before - let's move on!
Goal Conversion
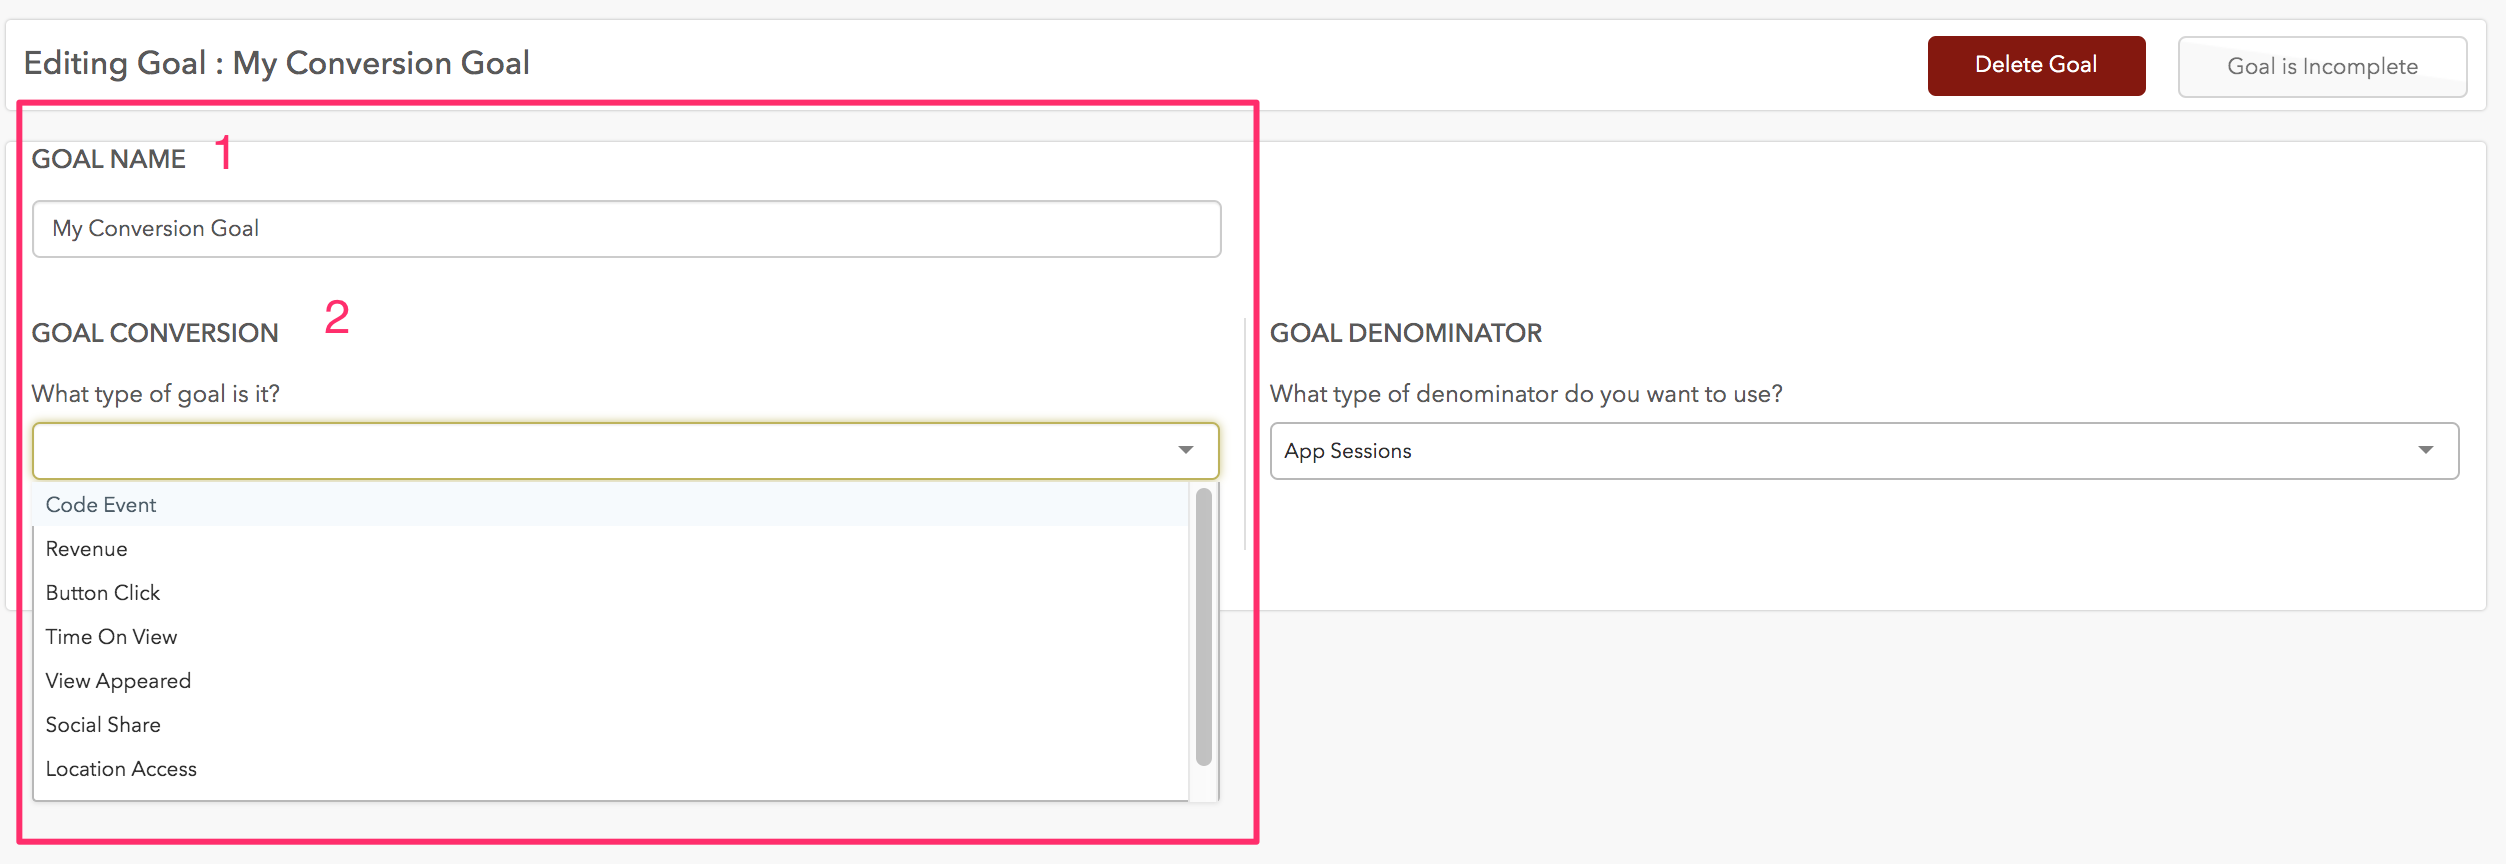
In the above image, to start, name your Goal (1) and then select what type of goal this will be (2). Taplytics allows you to select a large number of goal types.
You can read more about each of these here Types of Experiment Goals.
In this example, we will create a code event goal since these are most common and leverage existing events that you've passed in from your third party analytics provider or created via Taplytics.
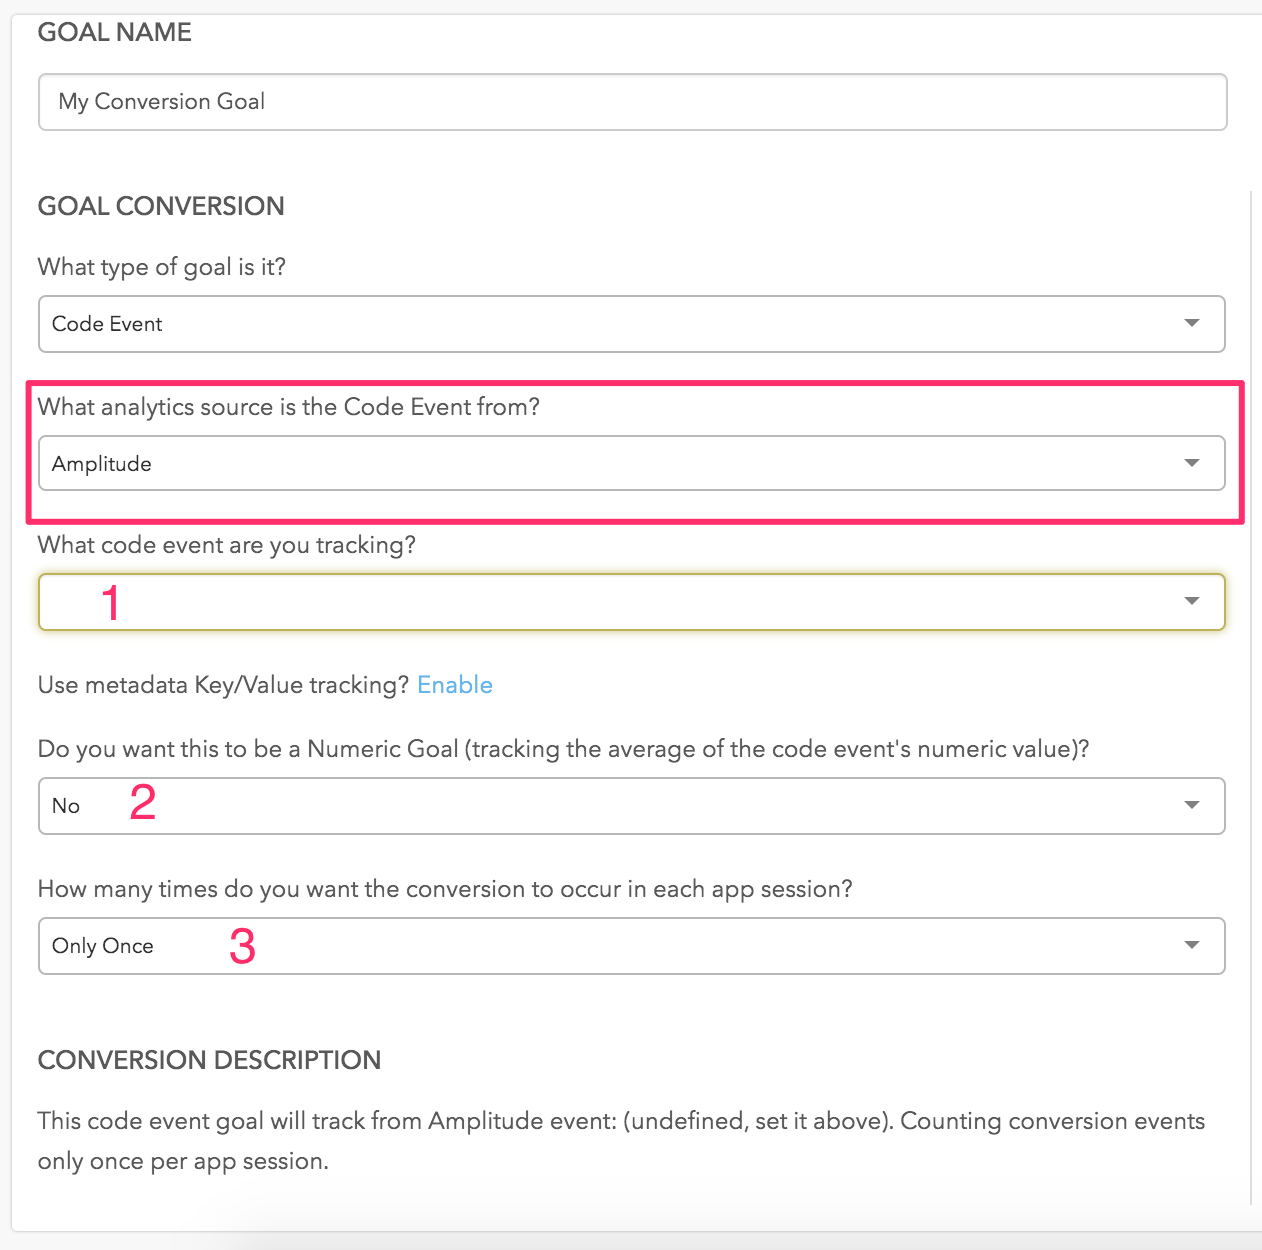
Once you've selected Code Event as the type of goal you'll be asked to select the Analytics Source for the event. In the example above, we've selected Amplitude.
-
What code event are you tracking?
Select your analytics event here -
Do you want this to be a Numeric Goal (tracking the average of the code event's numeric value)?
If there is a value associated with the event you're passing along and you'd like to track the average value of the baseline conversions and the variation conversions you can enable this.
For this example we will not be tracking the average numeric value of the goal. -
How many times do you want the conversion event to occur in each app session?
You can choose how many times you'd like this event to count towards the success of your goal. In this example, we will count it only once.
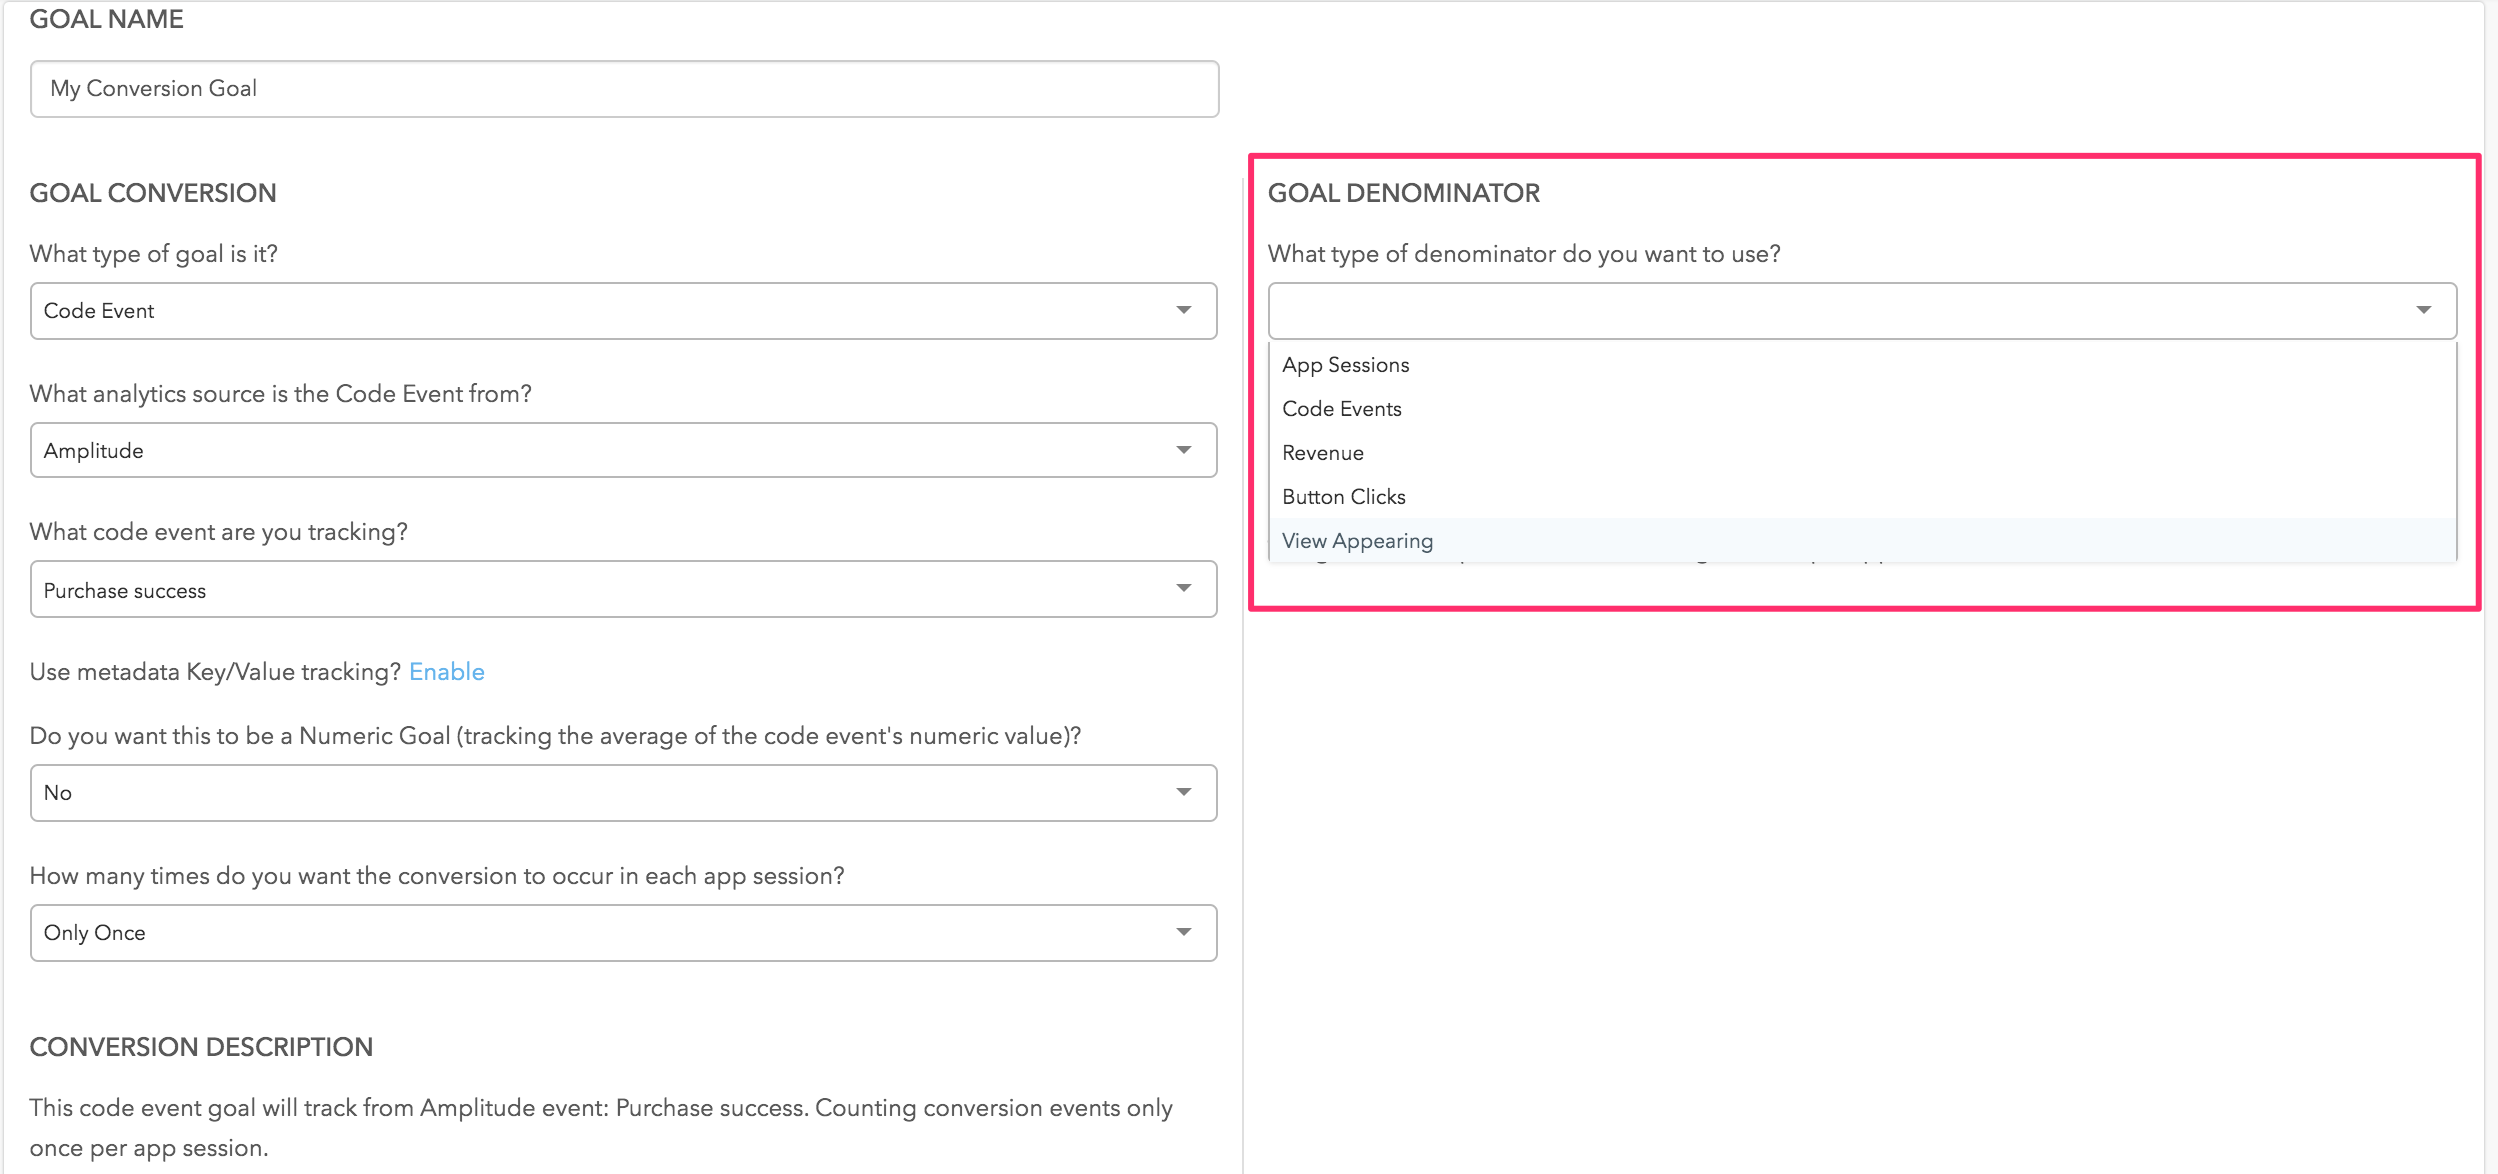
Goal Denominator
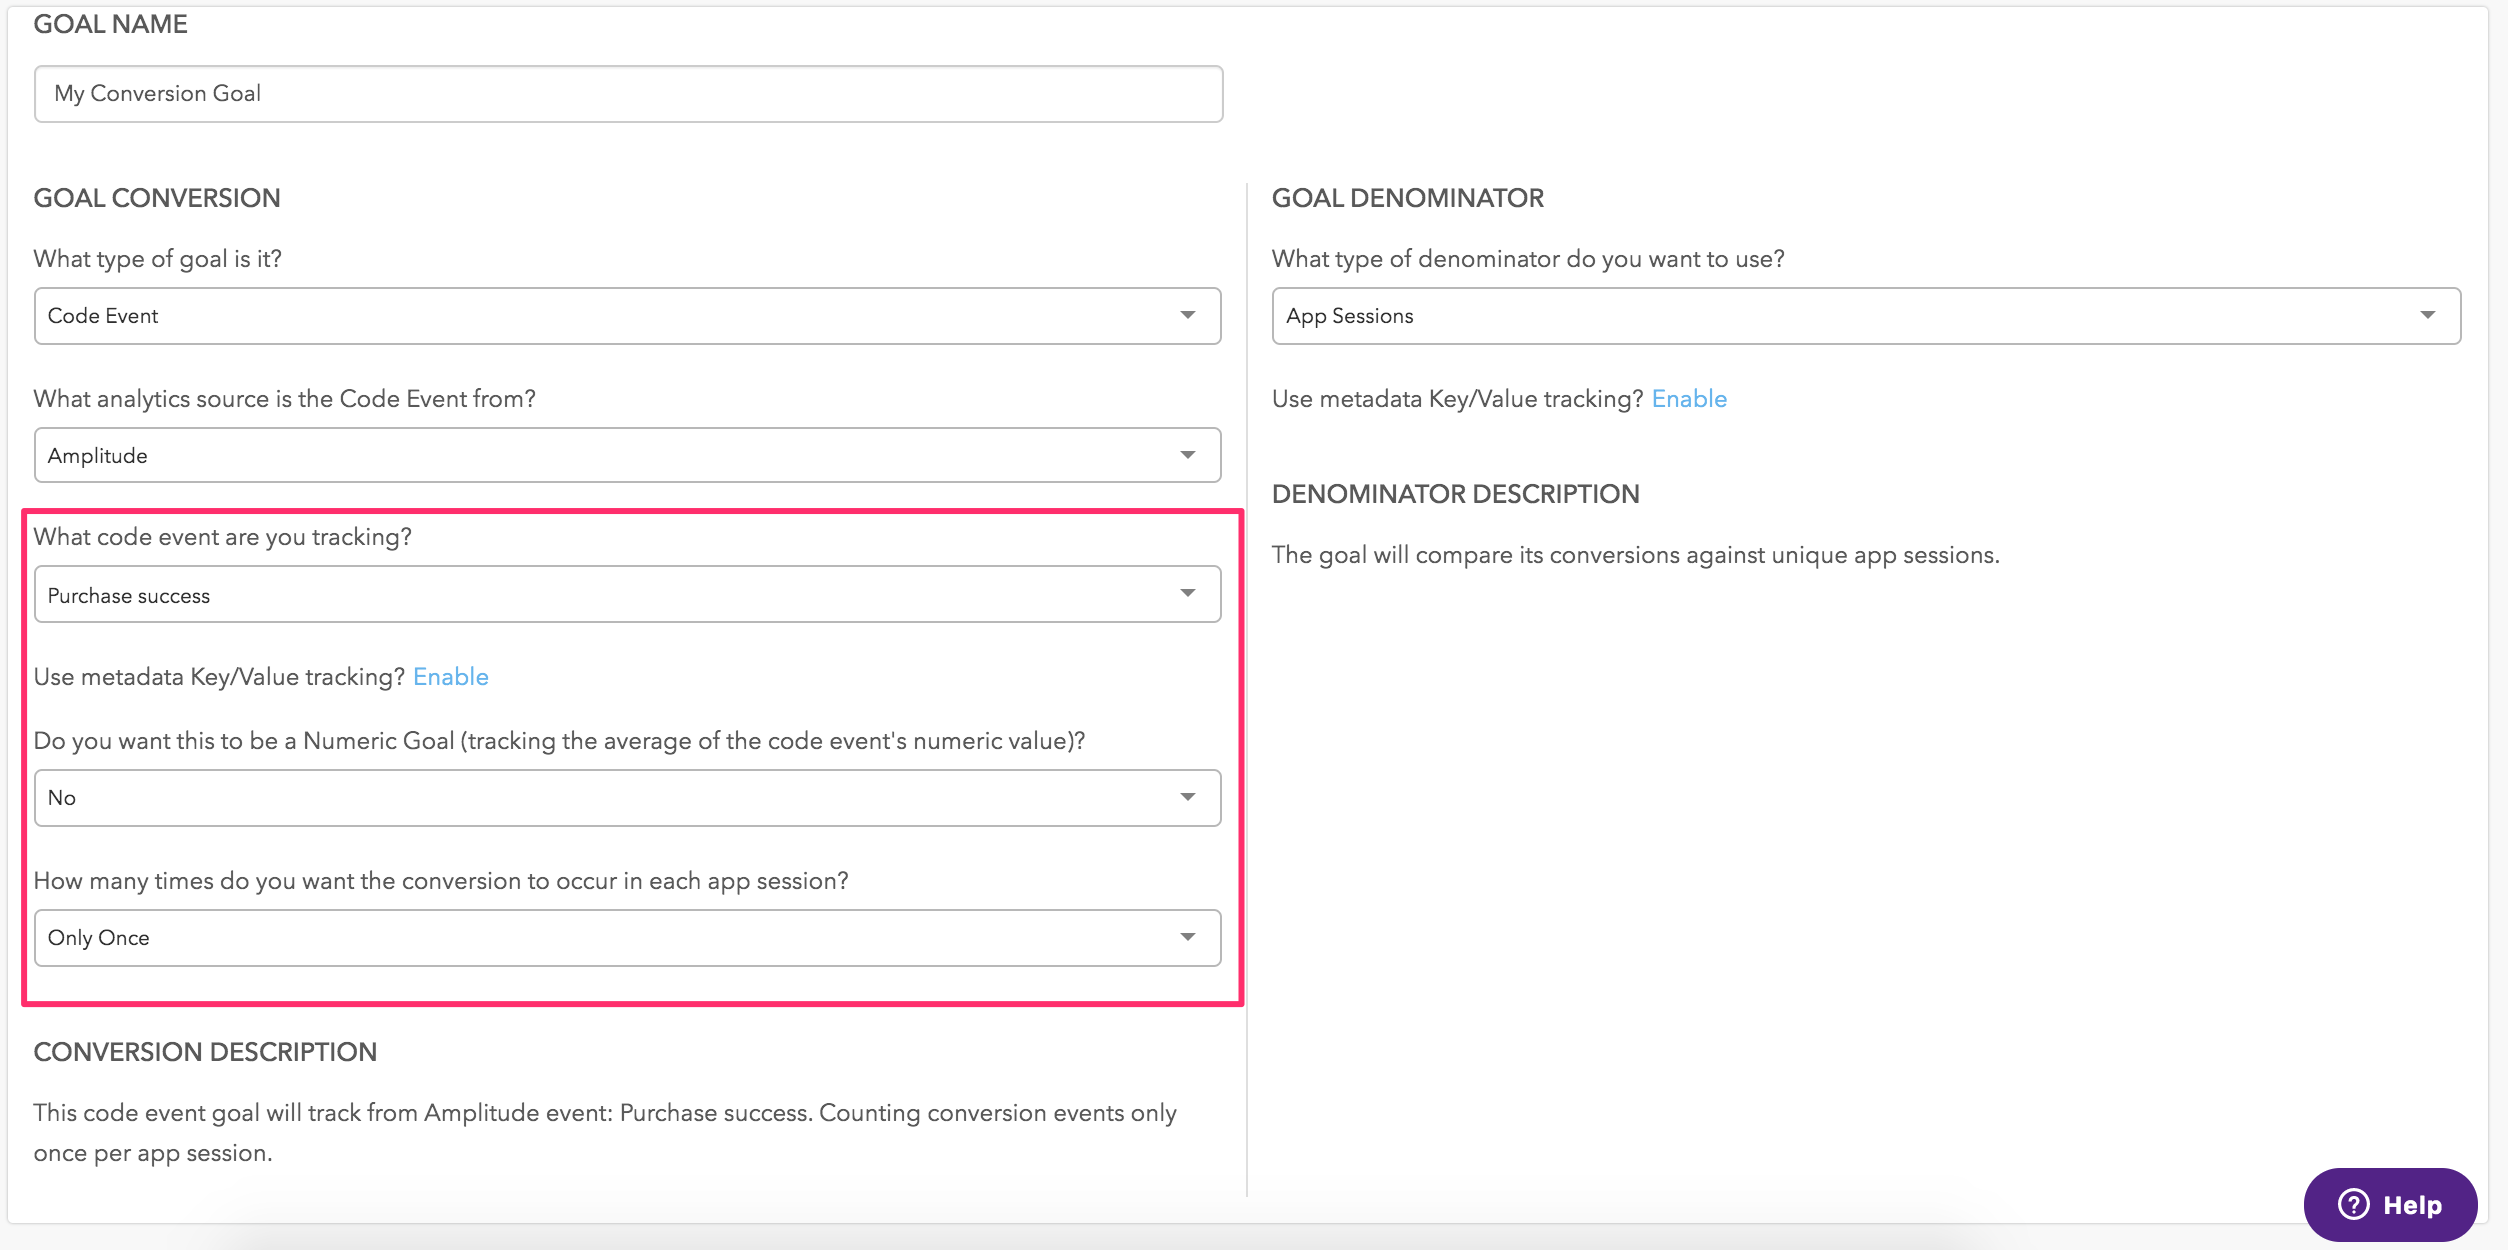
The Goal Denominator is what your Goal Conversion event will be counted against.
In most cases using app sessions will make the most sense since you might be only tracking how many times an event happens within a session.
Additionally you have the option of leveraging Code and other types of events.
For this example, we'll keep things simple and use app sessions but please see the image below for your additional options.
There you go! You've created your very first Taplytics goal. Congrats!
Time to start tracking the success of your experiments!
--
Keep moving through the experiment work flow!
What's next? Move to the Distribution tab to segment your audience!
-
Specifying the Audience Distribution
-
Reviewing the experiment set up and launching it to users!
Updated over 3 years ago
