2a. How to Create a Web Code-Based Experiment
Code Blocks and Variables
While the visual editor allows you to change elements you can touch, see and feel (colours, size, text, font, etc), it has it's limitations. What if you want to change something more fundamental about your website? For example, what if you want to completely change a critical workflow or introduce an entirely new feature?
Code blocks / variables are the tool that allows you to do that.
If you want to change more than just the visual elements on your website you can bring your imagination to life through code blocks and variables.
You can use them for a variety of different things such as, redesigning user onboarding or checkout flows or moving blocks of texts and video around your website. Anything that updates or modifies the logic behind your website; this is where you can use code blocks and variables to your advantage.
And the great thing is, you still don’t need to be a developer to do it.
What are Code Blocks and Variables?
Code variables refer to ‘variables’ that you can assign values to.
There are 4 types of variables on Taplytics that can cater to your every need. They are:
- String
- Boolean
- Numbers
- JSON
For string variables, you can assign ‘strings’; which are alphabetical values, or just words. For example, for a variable called ‘colour’, you could assign string variable values such as ‘blue’, ‘red’, or ‘mellow yellow’. Booleans – like in code – take on one of only two values: true or false. So to a variable called ‘new_user’ for example, you would store the values of either true or false because well a person is either a new user or not, it is not subjective. With number variables, we can create a variable called ‘price’ and store numerical values like 13.50, 3.99, 250 to represent $13.50, $3.99, or $250.
Code blocks, on the other hand, are a “block”, or a package of code. It differs from code variables because the entire set of code can have one or more code variables controlled by the condition set on the code block. If the condition to turn on the entire code block is not met, then none of the code variables or instructions encompassed within the code block will run. Nothing within that code block activates because the way code blocks work is that the entire block runs or the entire block does not run.
In that sense, it is much like a Boolean where the conditions are only one of two; true or false where the code can run if the condition is true and not run if the condition is false.
How you use both code blocks and variables really depends on your individual needs and what kinds of changes you're hoping to make on your website. So be creative and play around with both if you're able - find out which combo of visual and code experiments really give your users the best experience!
To review more technical information on you can go to our Dynamic Variables & Code Blocks Docs for JS.
Creating your Experiment
To start, ensure that the Taplytics JS SDK has been installed on your website and you have a project set up.
Setup your Experiment
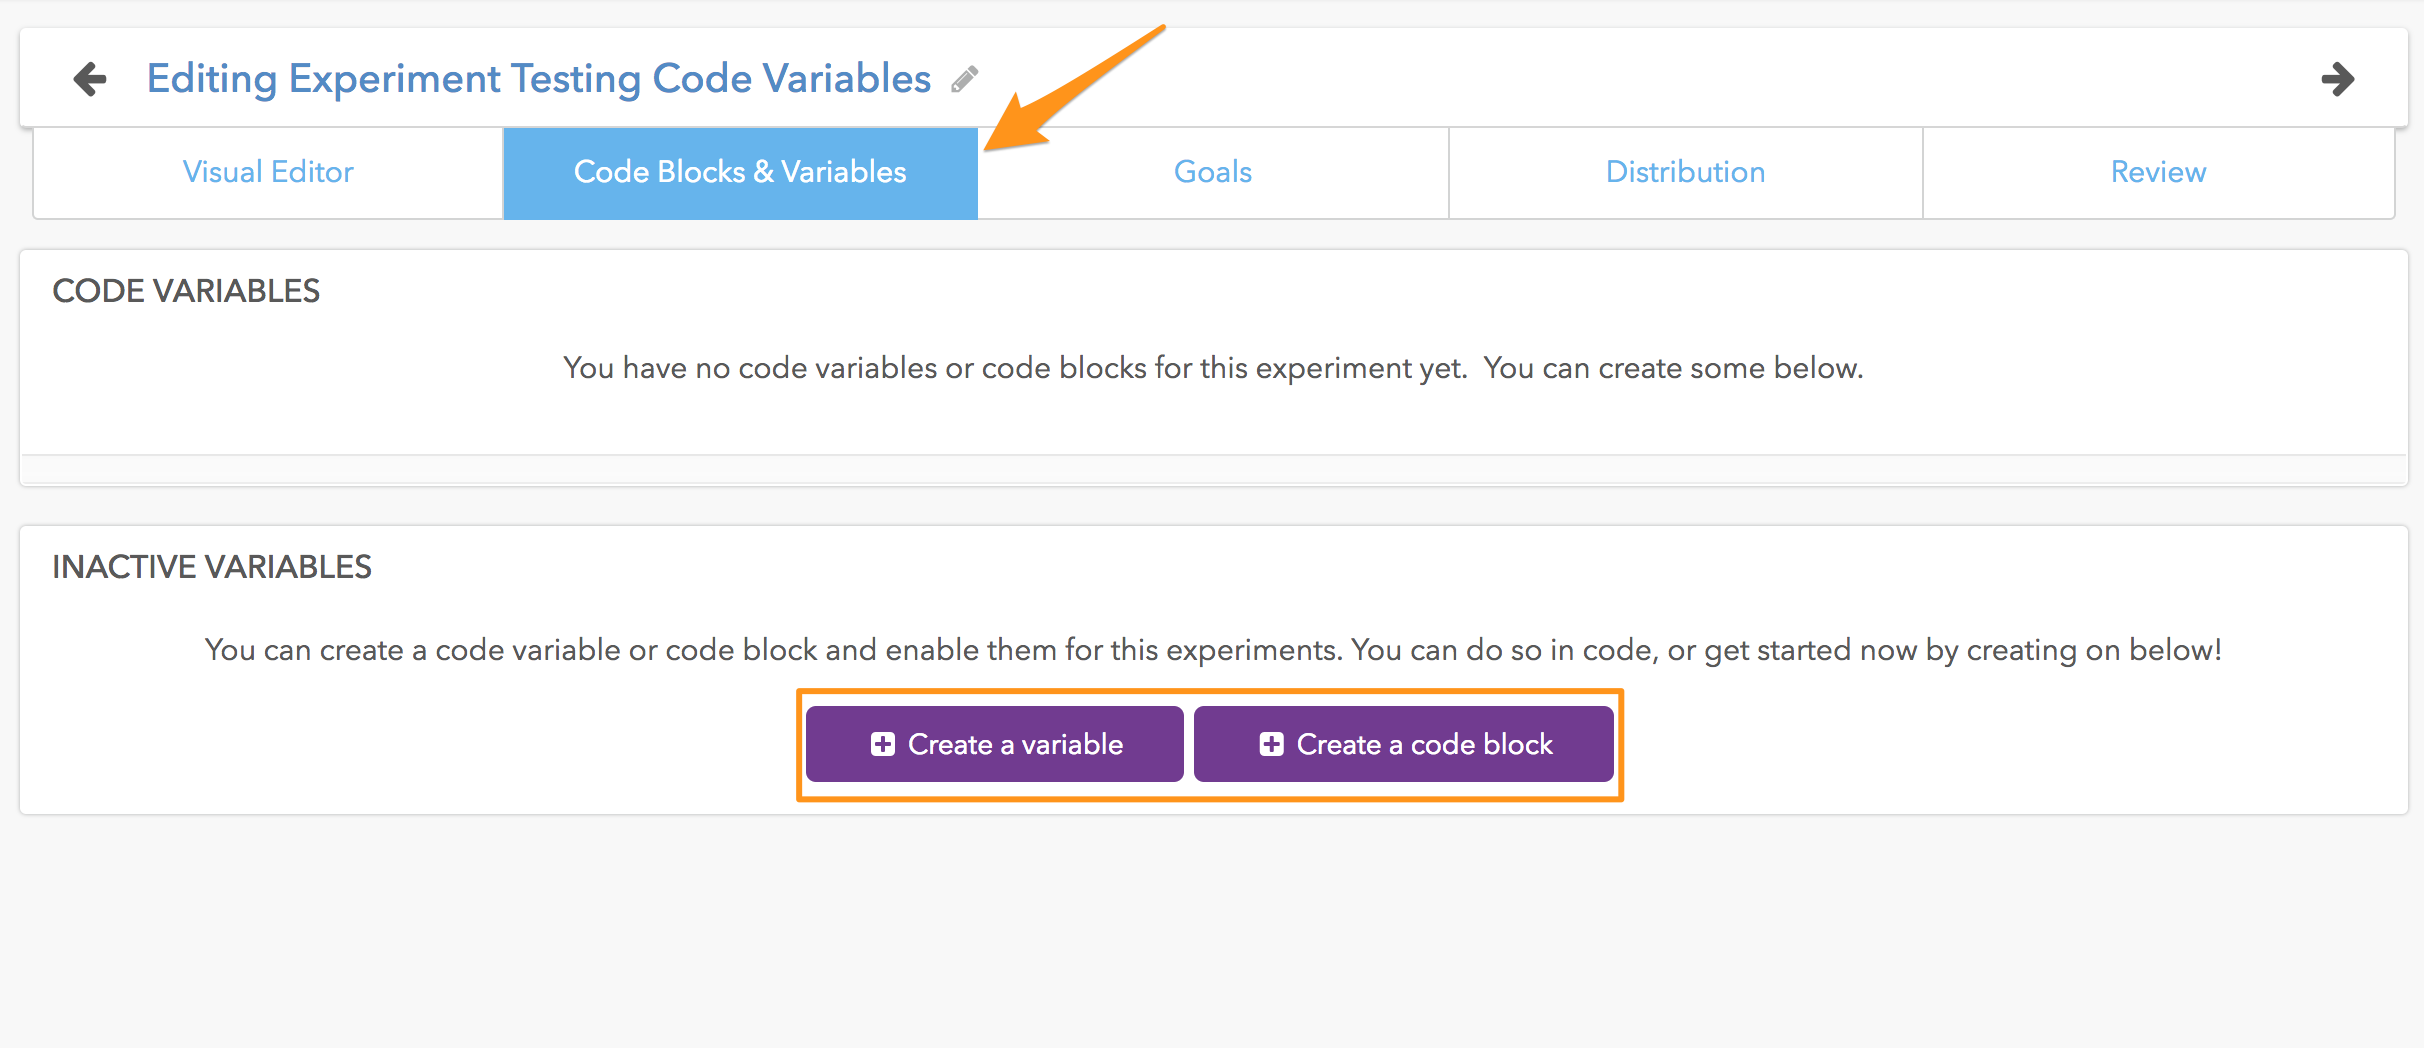
To start, create a variable or code block from the Taplytics Dashboard.

1. Create a variable
Once you click on the "Create a variable" or "Create a code block" button a window will pop up.

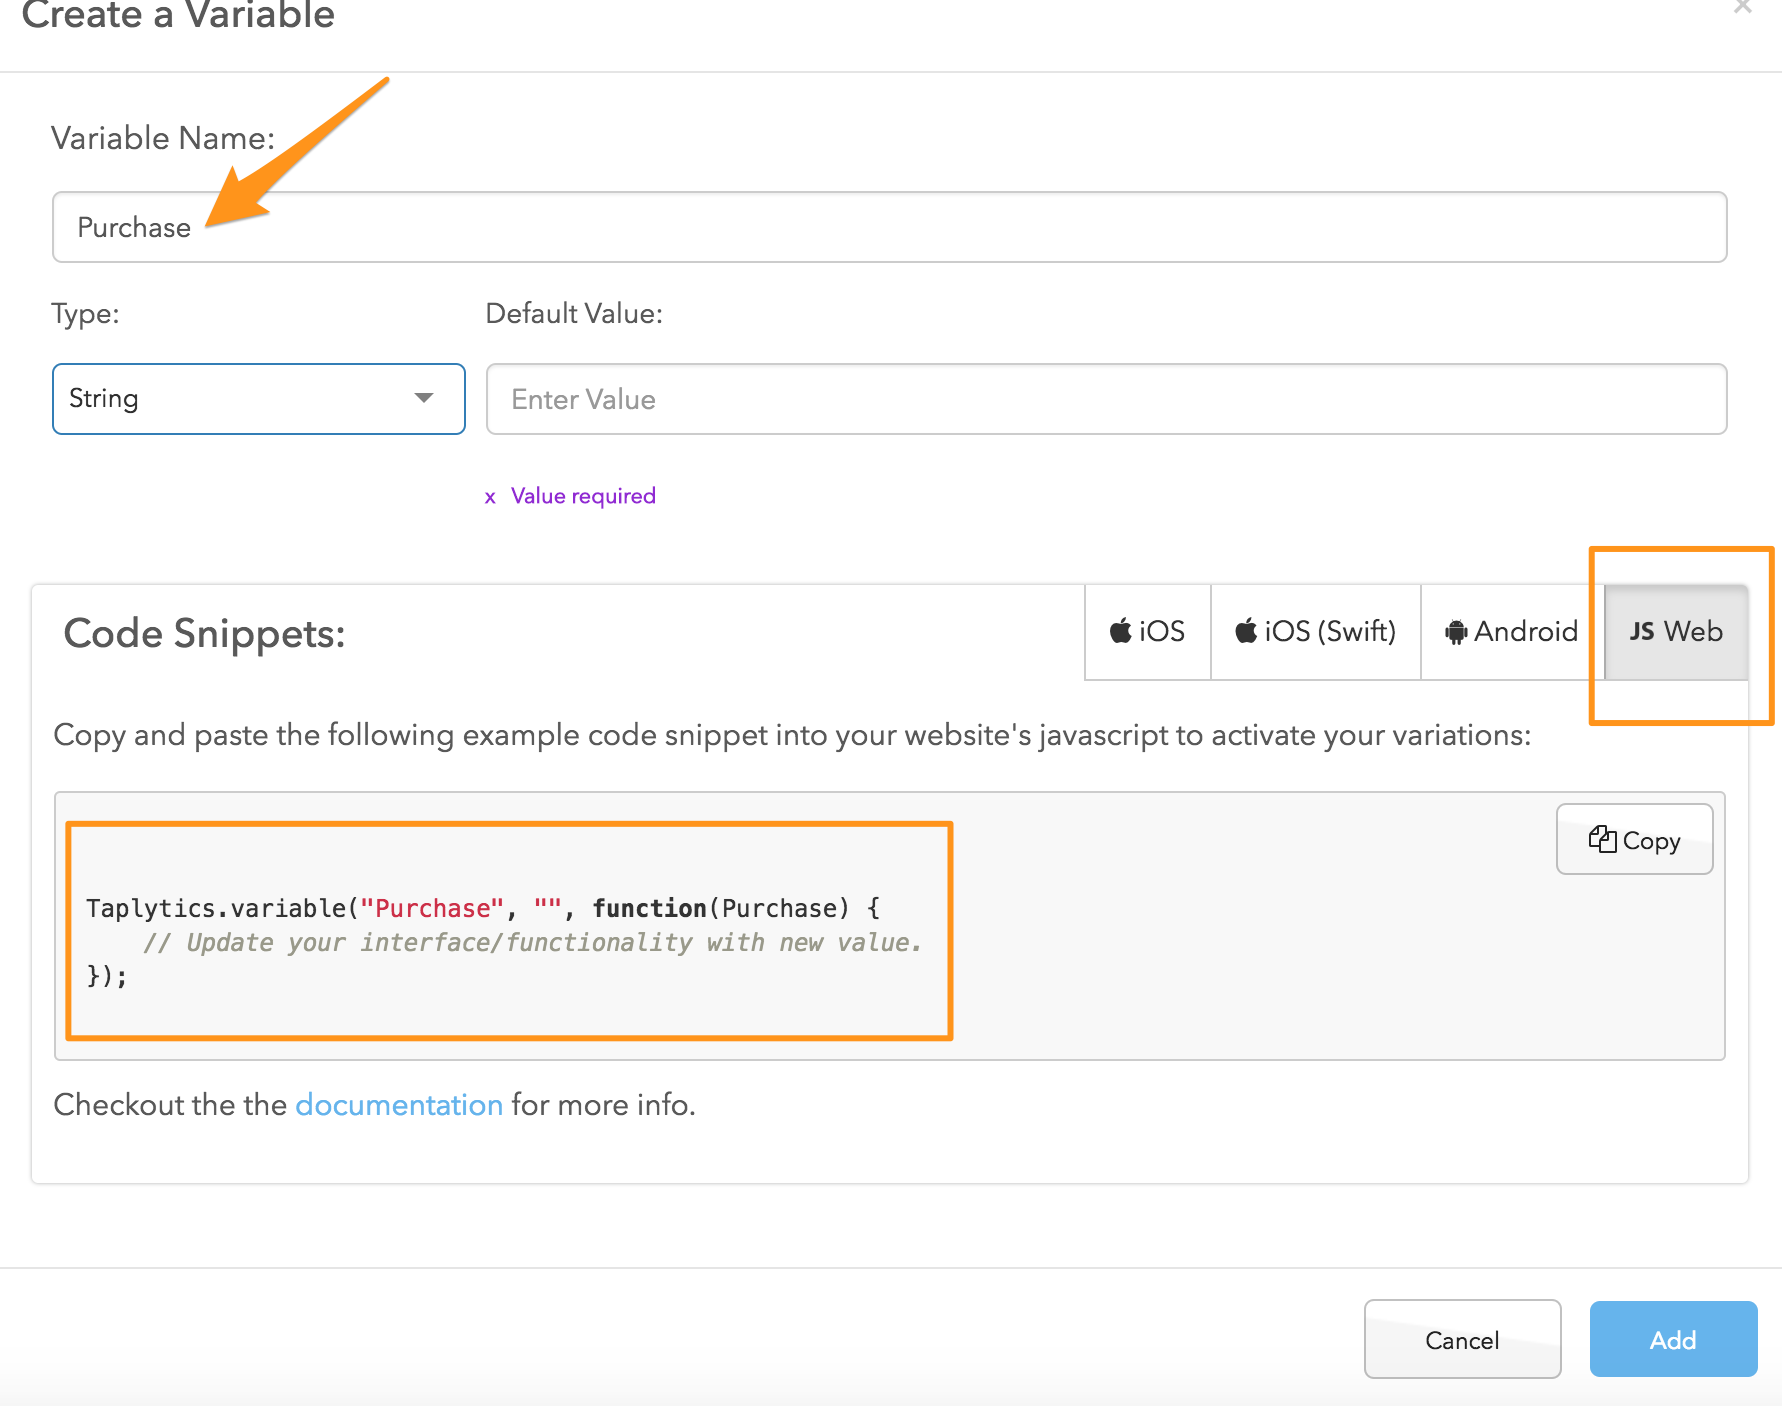
You can see from the above image that creating your variable is easy. Simply give it a name, choose a variable type (String, Number, Boolean or JSON), and set a default value. The default value is typically what the current value is on your app. Where as the variation will deviate from default, but we'll get to that later.
You will also see that Taplytics automatically generates the corresponding code snippets for you. It is important that you select the correct platform so that the code snippet that is generated is the right one for your needs. In this case, since we are review web code based experiments, we are using JS Web.
Once you've created your variable, it will be available on the Taplytics Dashboard under Inactive Variables.
You can create as many variables as you'd like! Just make sure to name them correctly so that it is clear and easy for your team to use them for other experiments!
2. Create variations
Next, in order to create different experiences for users you need to create "Variations" for the experiment.
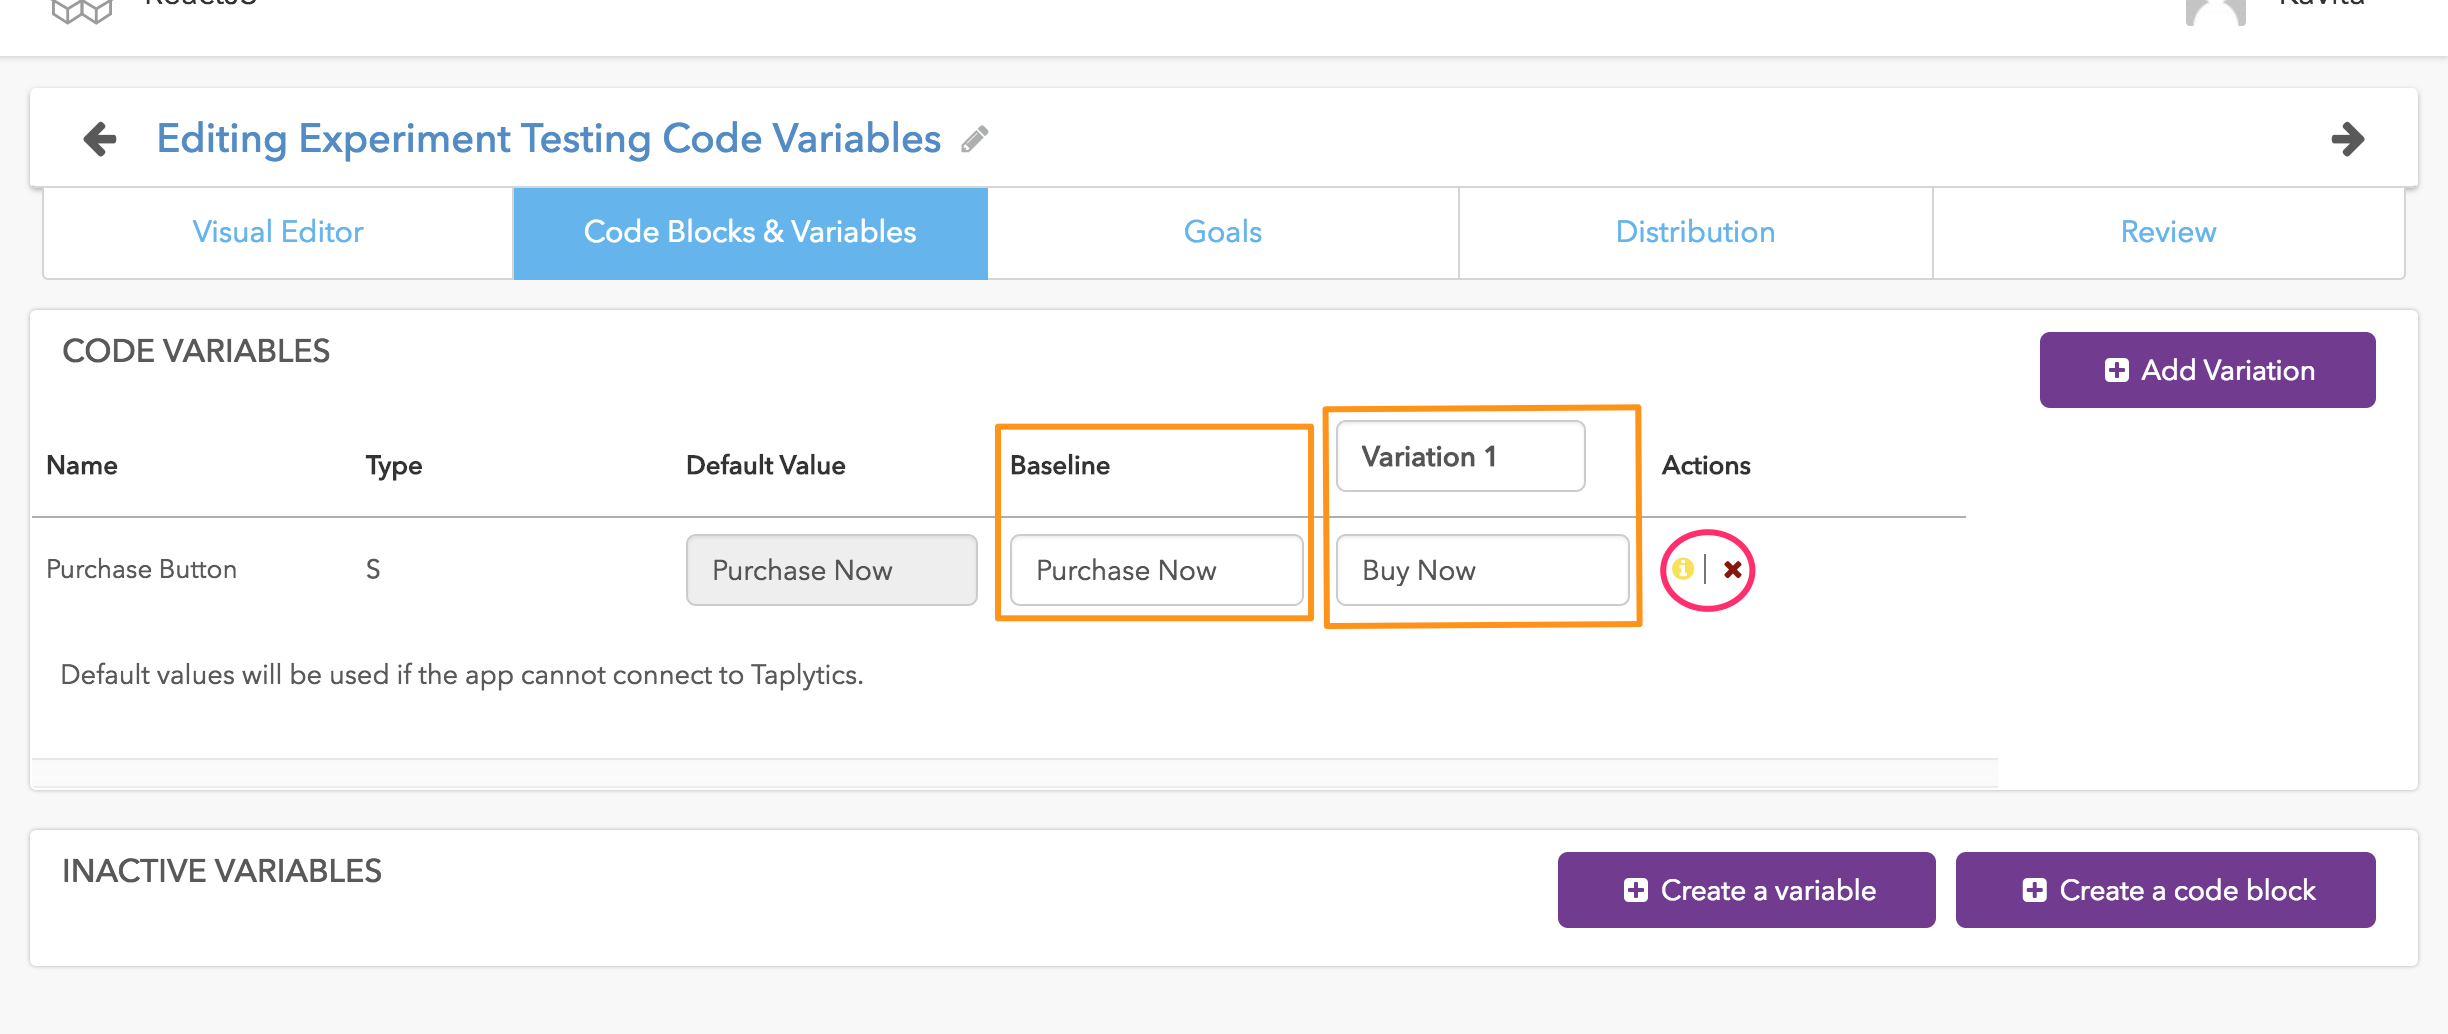
First, enable which ever variables you are planning to use. Once you do this, you will see that the variable moves from Inactive to another part of the Dashboard that allows you to manipulate the variable itself as you can see from the image below.

So we've created a variable, Purchase Button, which is wrapped around the copy a particular button on a page on our website. Now you can edit the copy of the button for Variation 1 of your experiment. You can also add variations if you'd like to test more than just baseline and one variation.
You'll also note that under the "Actions" section, there is a yellow icon and red 'x'. The yellow 'i' icon is showing that this variable is not yet active. In order for it to become active and actually function, you need to provide your development team with the code snippet so they can put it into the correct spot on your website. In this case, around the corresponding button copy. Also, once it is released in code you will need to navigate to the variable at least once for the icon to change colour.
Creating a code block is exactly the same as creating a code variable - but instead of one element from your website being wrapped in a Taplytics variable, you're wrapping entire functionality within a code block. Don't forget, this functions in only an True or False state.
Keep moving through the experiment work flow!
What's next? Move to the Goals tab or start creating goals!
-
Creating Goals
-
Specifying the Audience Distribution
-
Reviewing the experiment set up and launching it to users!
Updated over 4 years ago
