Universal API: How to Create a Feature Flag
Launching Feature Flags
For developers, by developers
Taplytics offers an API based solution to run feature flags on your project. This is a quick overview on how to implement code-based experiments using Taplytics Universal API without any SDKs.
Note: These instructions assume that you have done the following:
1. Create your feature flag
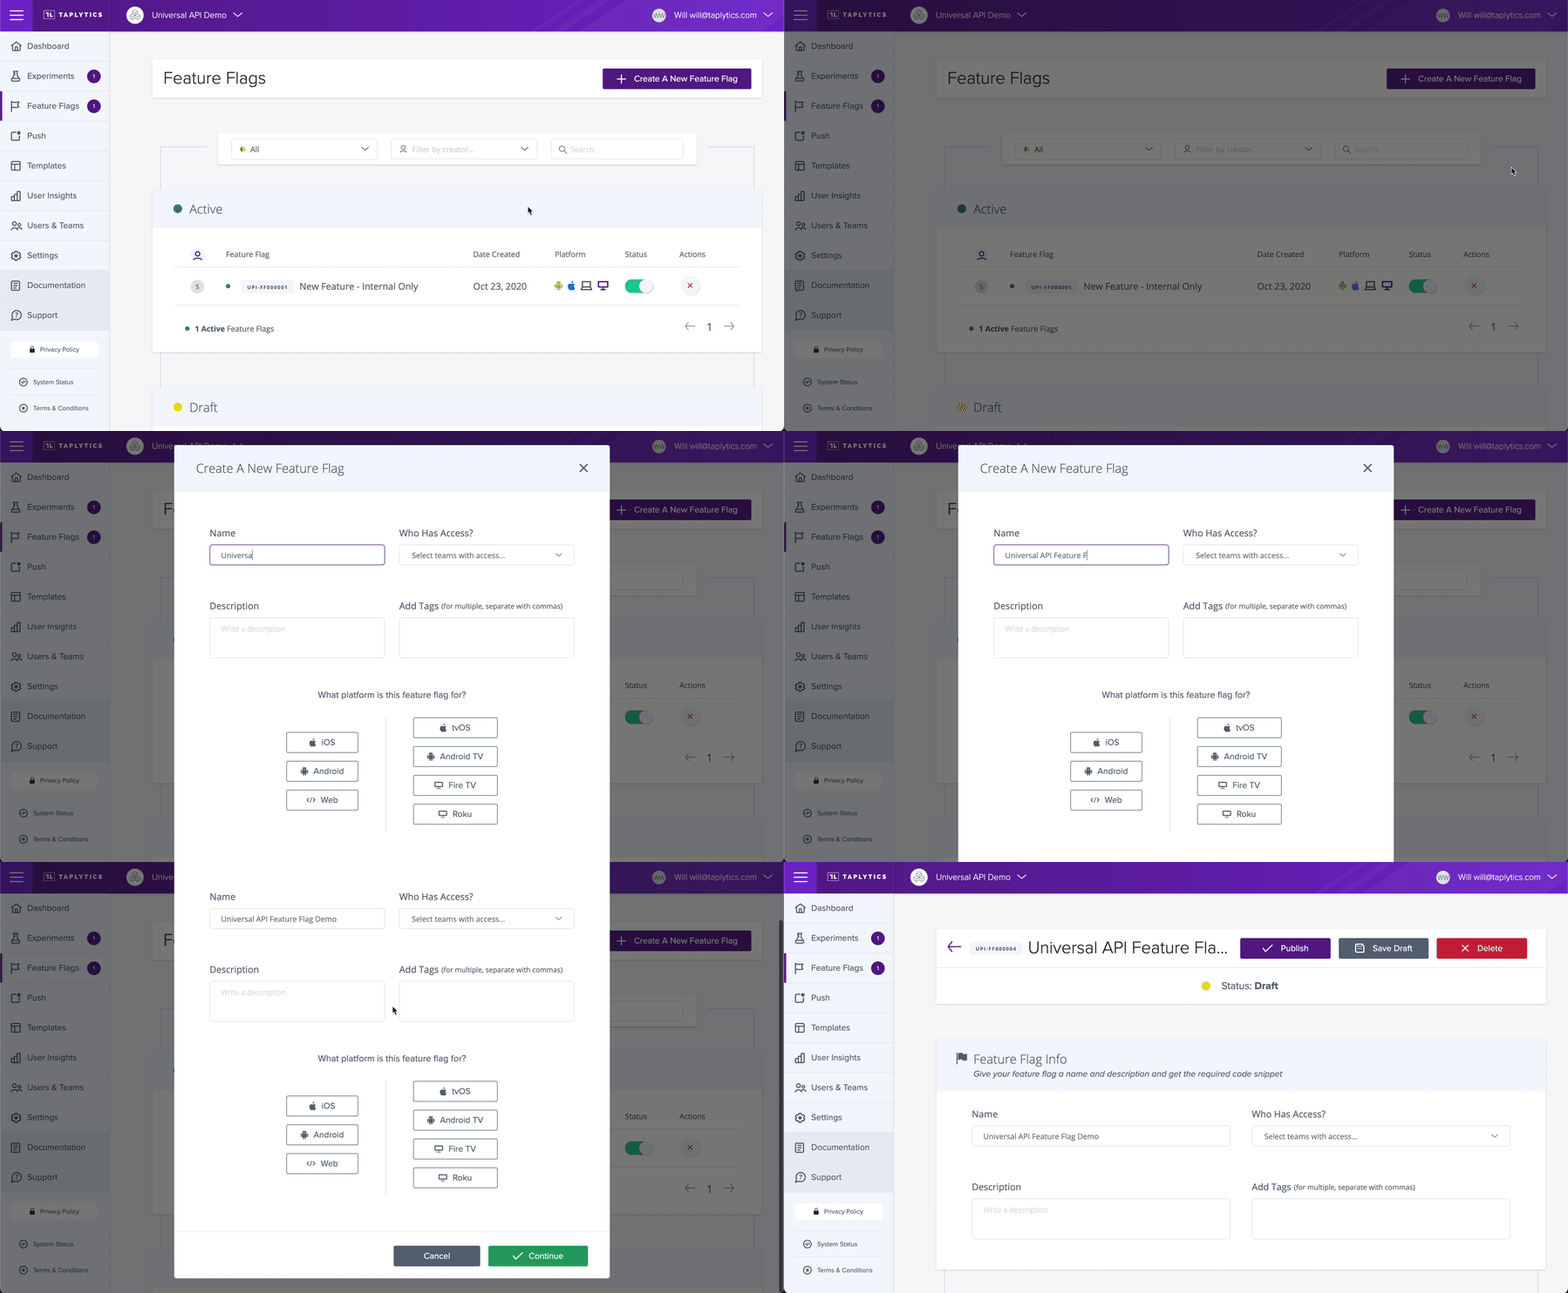
On the Dashboard, you will find all things feature flags under the Feature Flags menu. To create your first feature flag, click on Create a New Feature Flag. Give it a name, and a short description to keep things organized. Once done, click on "Create Feature Flag" to get started!

An important consideration before you create your feature flag is do not choose a platform for Universal API server-side experiments.
2. Ensure you reference the feature flag key name in your backend logic.
After you have created your feature flag in the Taplytics dashboard, you need to make sure the keyname matches your feature flag if statement for us to recognize a user that qualifies for the feature flag implements your new feature - this will of course require some coding, but we are more than happy to walk you through how to incorporate these snippets into your implementation!
To access feature flags and evaluate a user’s eligibility for them, you can use either of two endpoints: /v1/featureflags or /v1/isfeatureflagenabled.
/v1/featureflags will output the full set of feature flags that the user is eligible for, i.e.
POST https://decision.taplytics.com/v1/featureflags?token<Taplytics SDK Key>=&user_id=<userID>
/v1/isfeatureflagenabled allows you to specify a feature flag key, and the result will then determine whether the user is eligible for the feature flag you have specified in the call.
POST https://decision.taplytics.com/v1/isfeatureflagenabled?token=<Taplytics SDK Key>&user_id=<userID>&featureFlagKey=newFeatureFlag
3. Select your audience
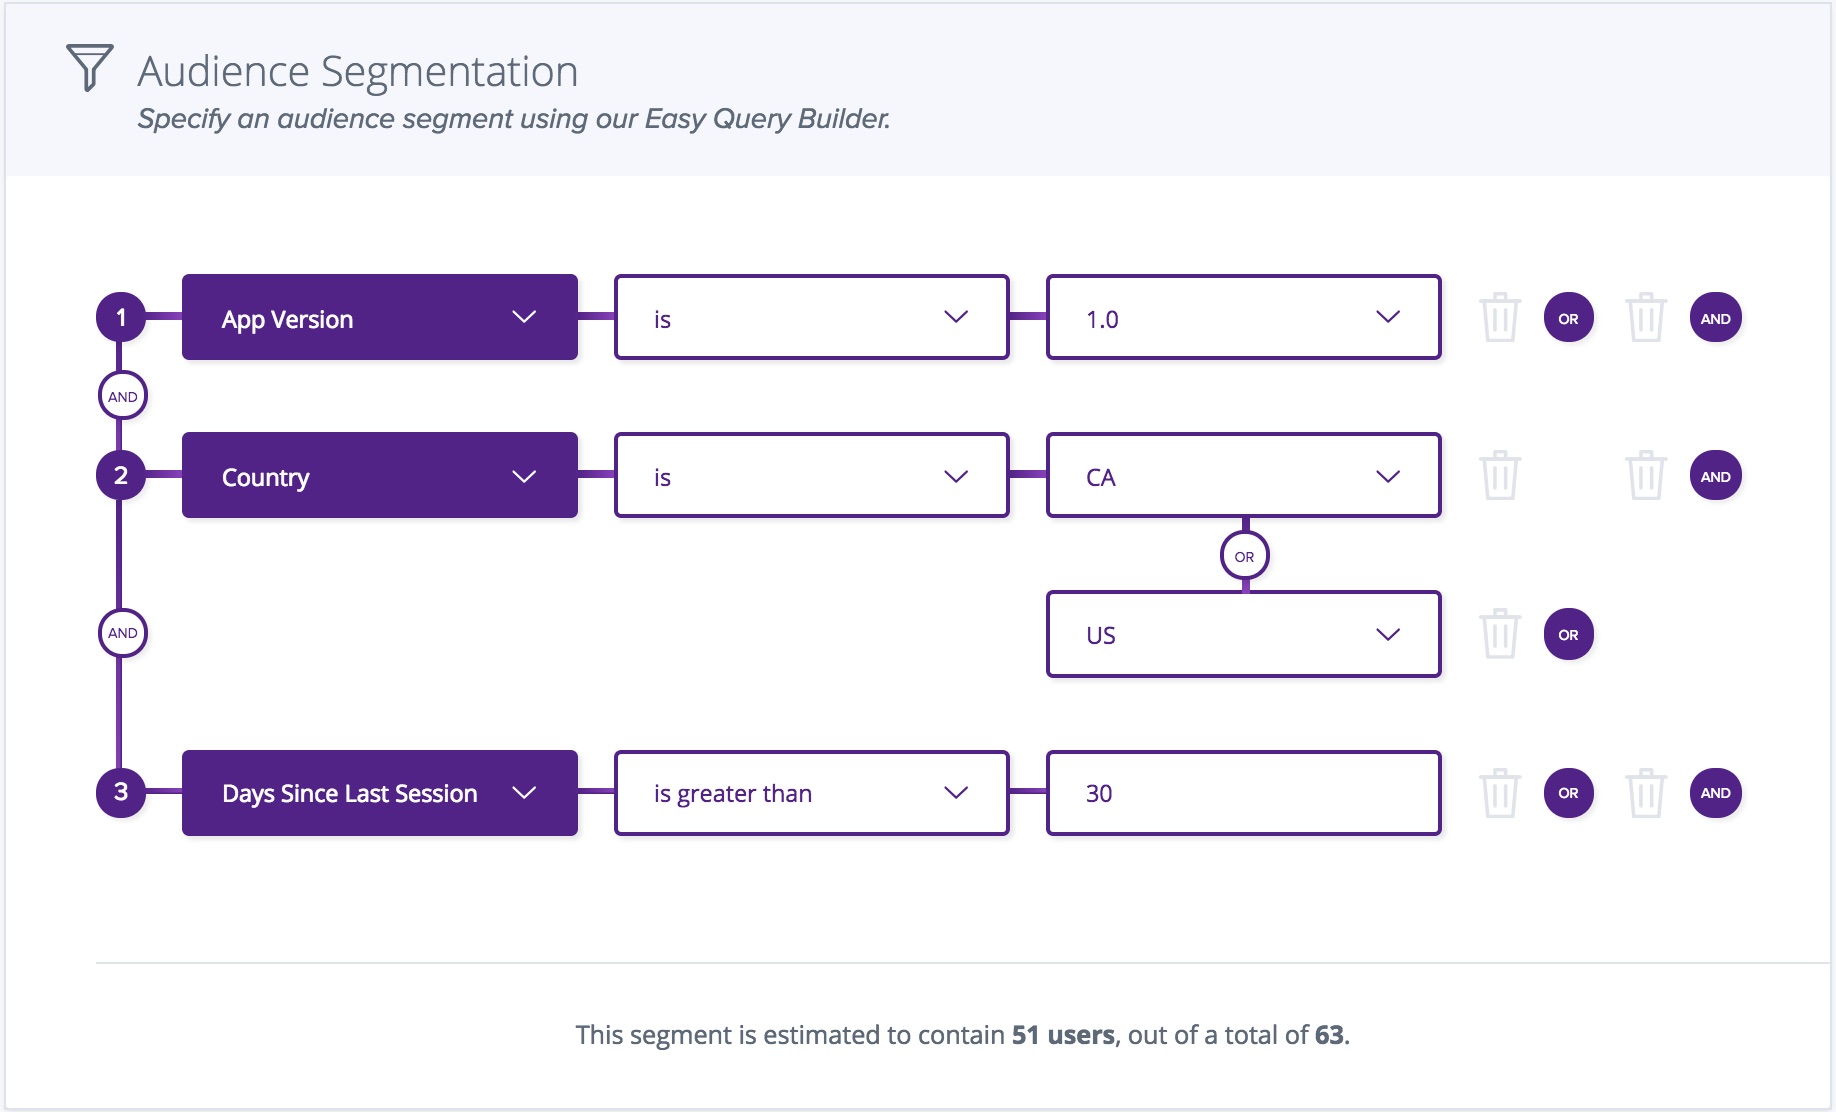
Next, you will need to specify an audience segmentation - this narrows down which users will be receiving your feature flag. The options are virtually endless; you can filter by anything from app version to demographics to days since sign up or login.
Important note: In order to properly segment your users for Universal API driven feature flags, is sending in custom user attributes, where you will need to pass your customer user attributes in the body of your request.

4. Setup your rollout
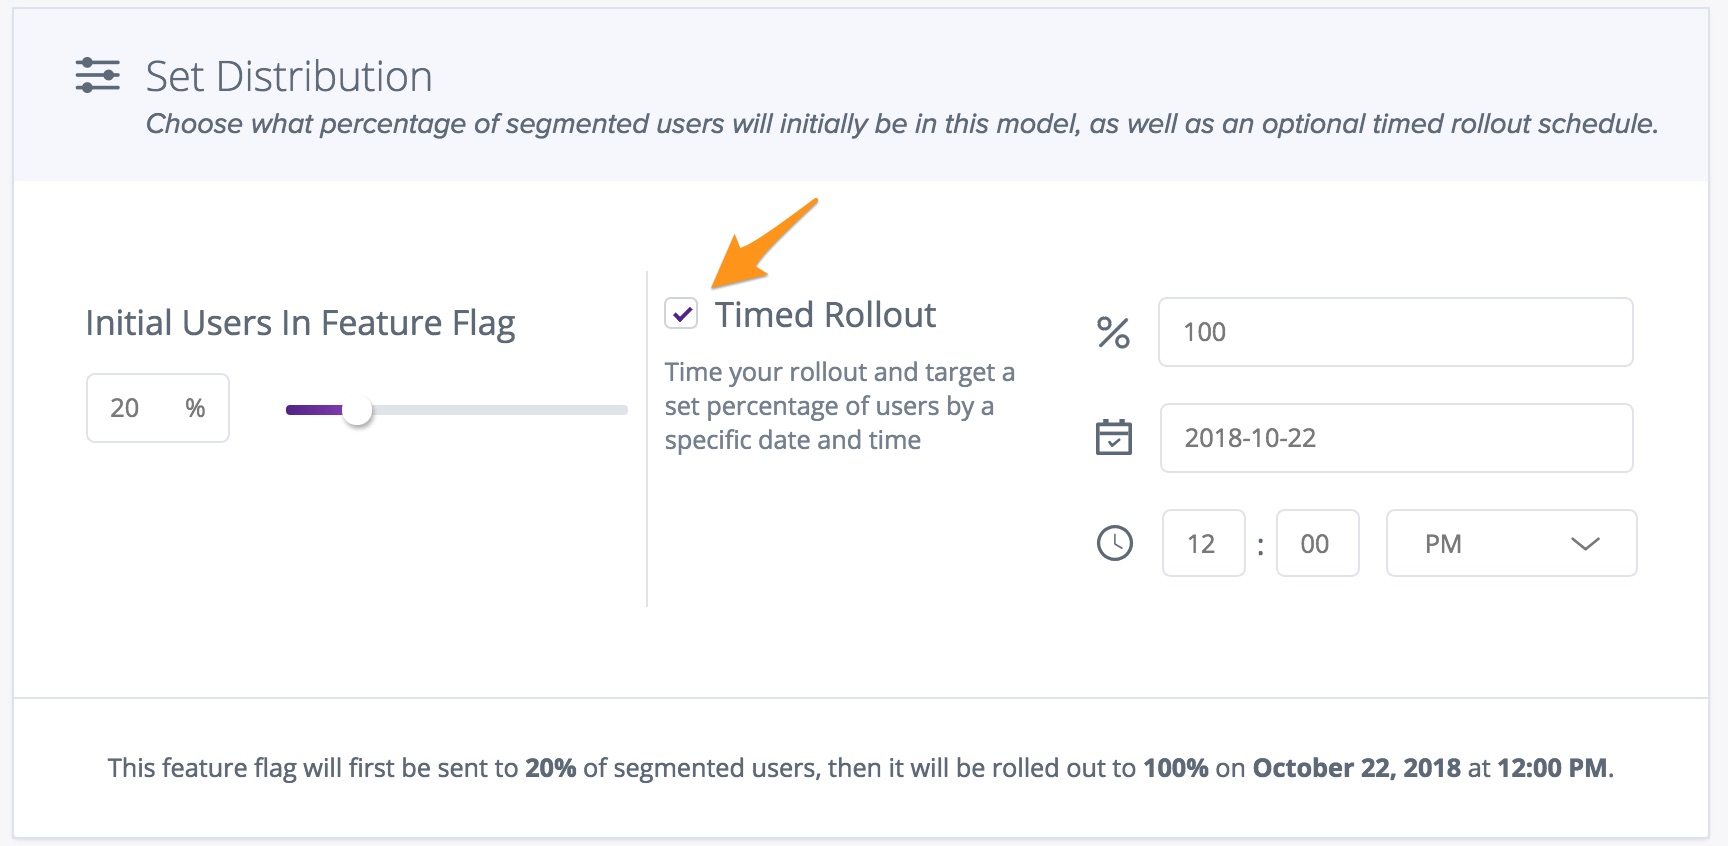
This section allows you to choose what percentage of the selected users will be initially included in the rollout. You also have the option to set a timed rollout schedule, where you can control a release and contain problems easily as you increase or decrease the number of users in a feature.

Timed rollouts are enabled by setting the initial % users to less than 100%, and ticking the "Timed Rollout" option. Within the "Timed Rollout" section, you can select the target % of users who will receive the feature by the end of your timed rollout, and the target Date/Time that you would like your timed rollout to be finished by.
5. Launch!
Once you are happy with your feature flag configuration, all you have to do is click the Publish button and your new feature flag is ready to go!
Updated over 4 years ago
